IRIS 12 Pay upgrade process
Company directors upgraded part way through the year: The director will receive the full allowance again unless a setting is changed in Staffology Payroll. This must be done before the first payroll. Find out more.
My ePay Window: To avoid creating a duplicate My ePay Window account and before you publish. The support team will have to configure your account to accept a connection from Staffology Payroll. Contact the migrations team at migrations-staffology@iris.co.uk to start the process. This should be at least 7 working days before you publish using My ePay Window.
Pension Year to dates: These will need to be added to the employee pension in the employee record. Employee record > Pension > Click edit pension > Pension YTDs > Edit Opening Balances.
Average holiday If an Employee's work has no fixed or regular hours, their holiday pay will be based on the average pay they received over the previous 52 weeks (or a average based on the available number of weeks if less than the full 52. calculation: The upgrade tool brings across the cumulative values, this is not enough to calculate the average holiday rate. In order for the system to do this you will need to add in pay history.
Nearly there, we're getting closer to the upgrade
The upgrade tool needs to be installed on the same computer as the payroll software.
If your software is run from a remote server or hosted externally, please contact the hosting provider.
Before you start:
-
Read the before you upgrade instructions.
-
Sign up to a Staffology Payroll account.
-
Generate an API Key in Staffology Payroll.
-
Install the IRIS Payroll Upgrade Tool.
| Play a demonstration of the Upgrade Tool |
In IRIS 12 Pay, ensure you have finalised the pay period for every pay frequency in each company you wish to upgrade.
-
Download and install the IRIS Payroll Upgrade Tool: IRISPayrollUpgradeTool.exe (v26.10).
-
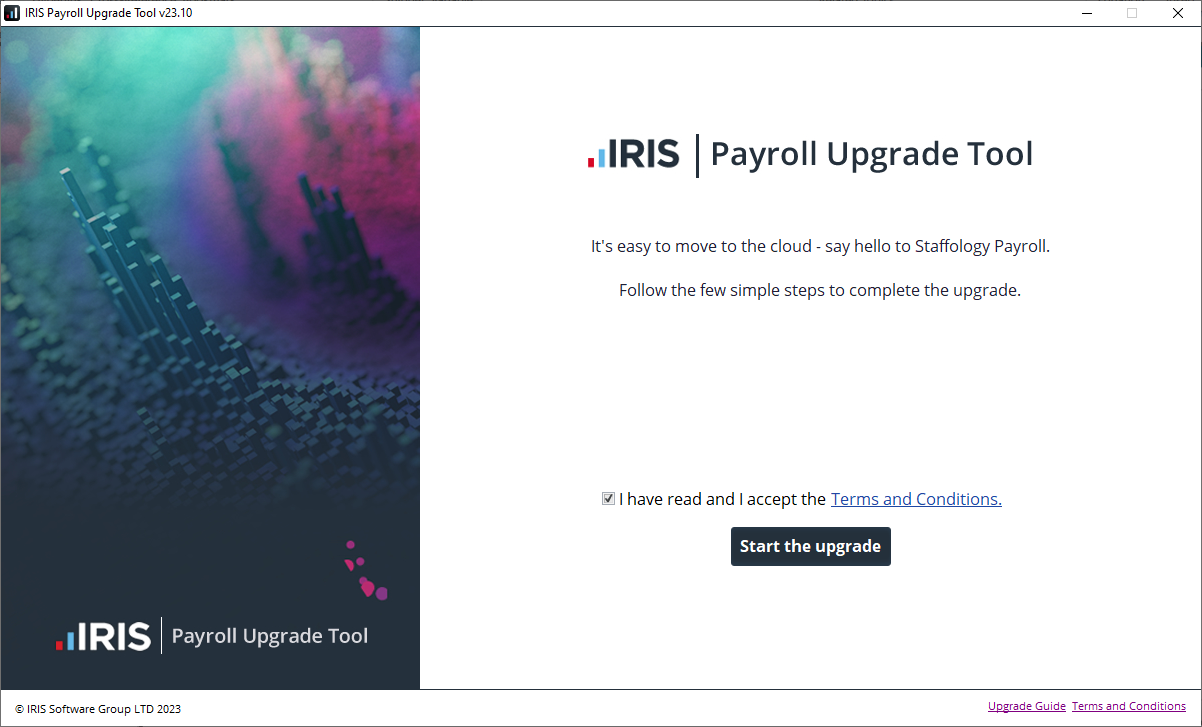
Read and accept the Terms and Conditions.
-
Select Start the upgrade.
-
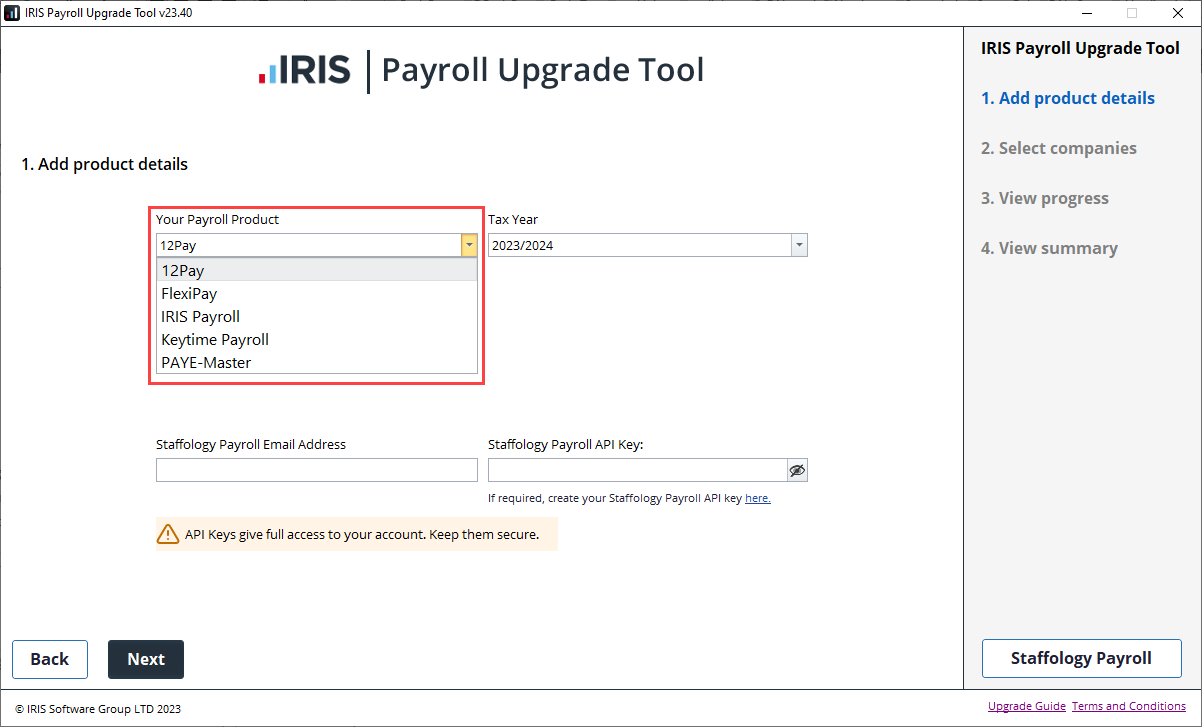
Go to Your Payroll Product and select IRIS 12 Pay.
-
Select the Tax Year.
-
Enter your Staffology Payroll Email Address.
-
Enter your Staffology Payroll API Key.
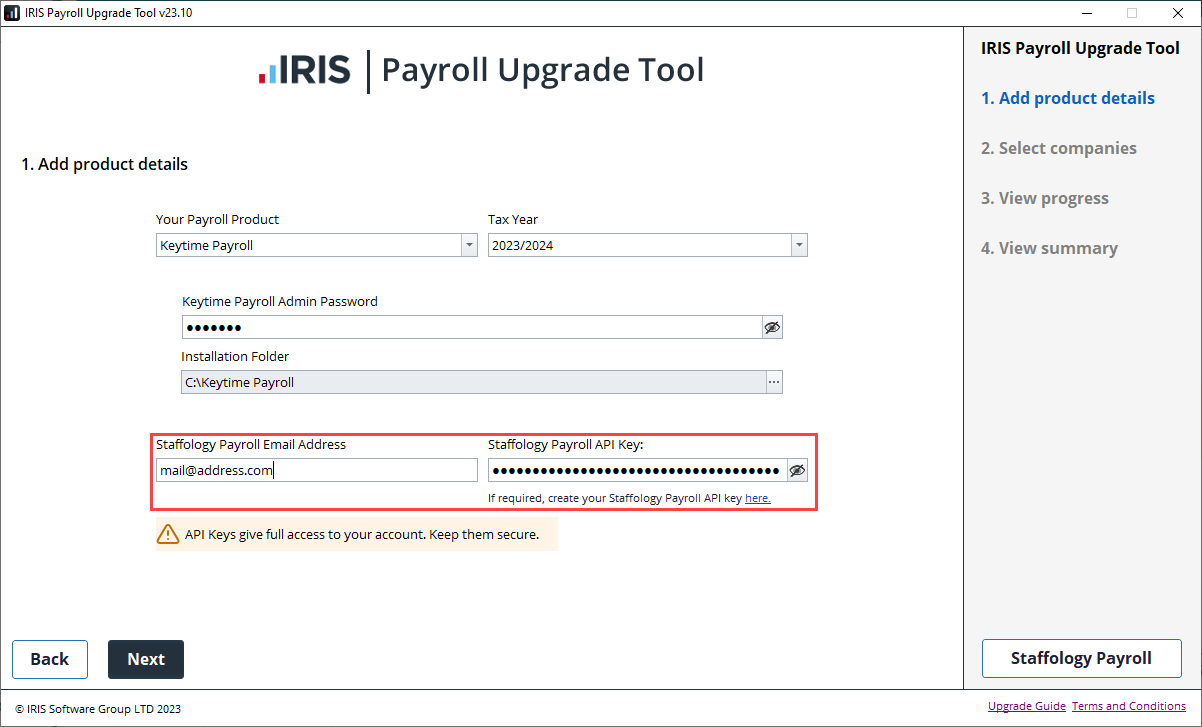
Do not let anyone else have the API Key. Treat it like a password.
-
Select Next and choose the companies you wish to upgrade.
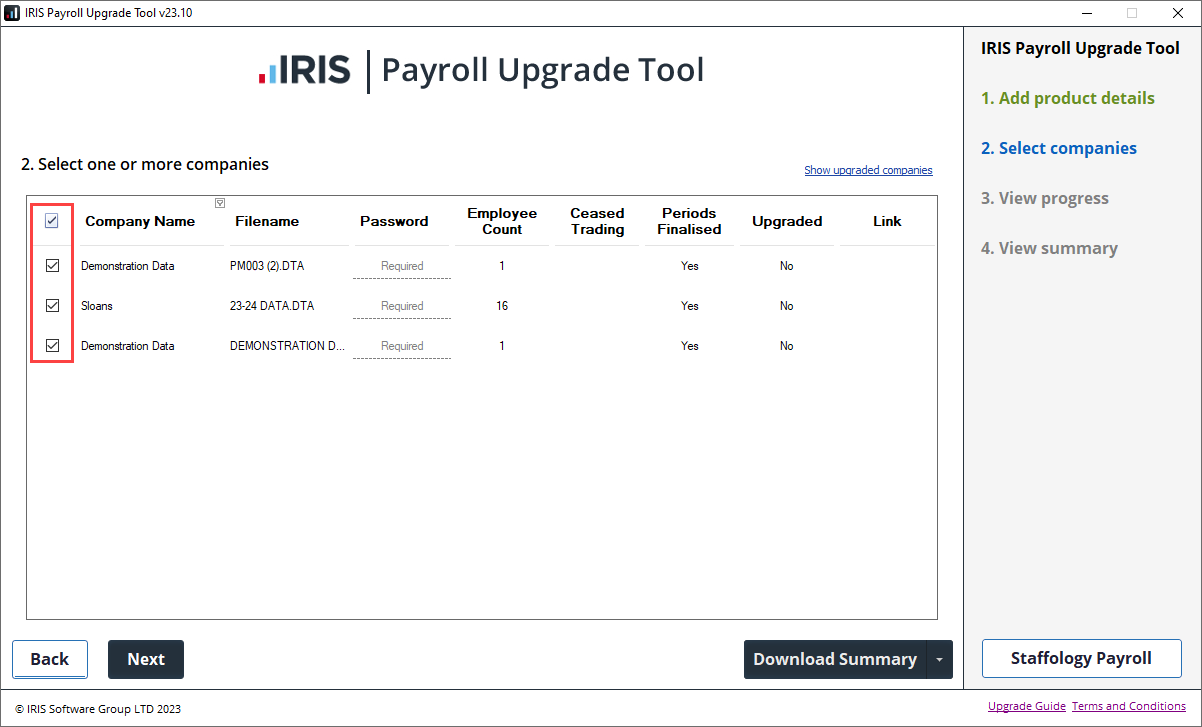
Companies not finalised) will not be selected and can't be upgraded.
-
Enter the company password for each company you are upgrading.
Select Show upgraded companies to re-upgrade a company.
-
Select Next.
-
Select Upgrade and the upgrade process will be shown.
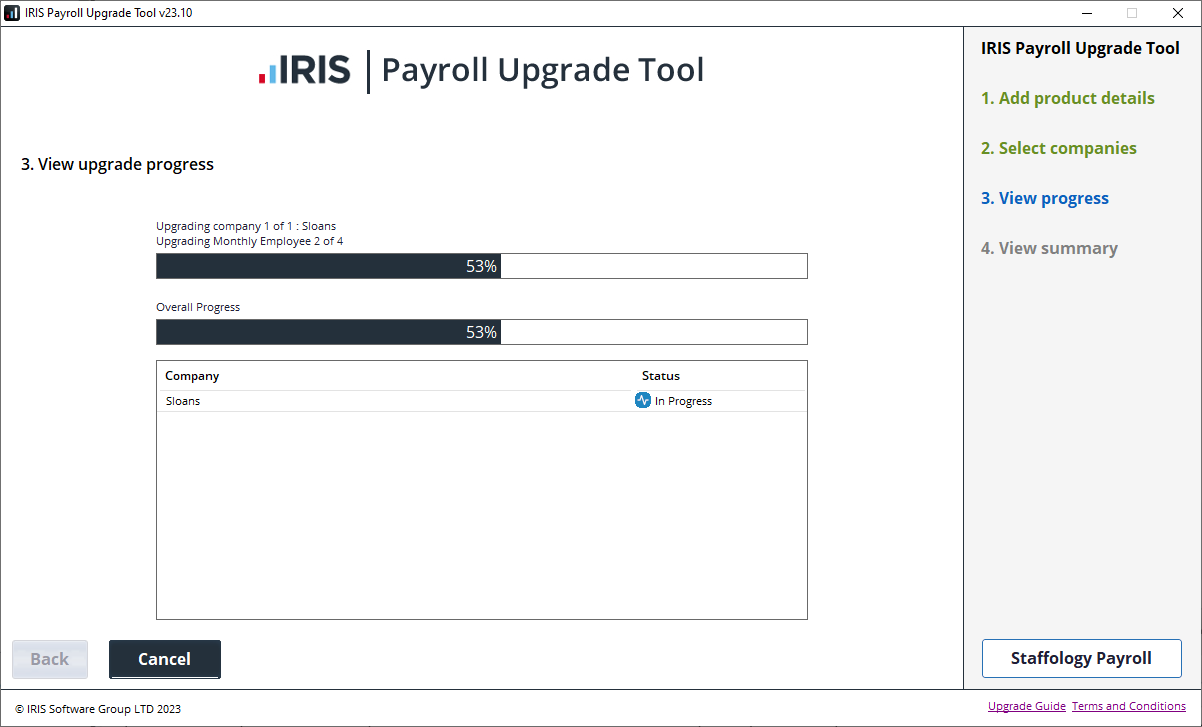
This may take some time. Please do not turn off your computer during the upgrade process.
-
The company name and upgrade status is shown.
-
Select Cancel to stop the upgrade at any time.
You cannot cancel the upgrade process for the current company once it has begun.
-
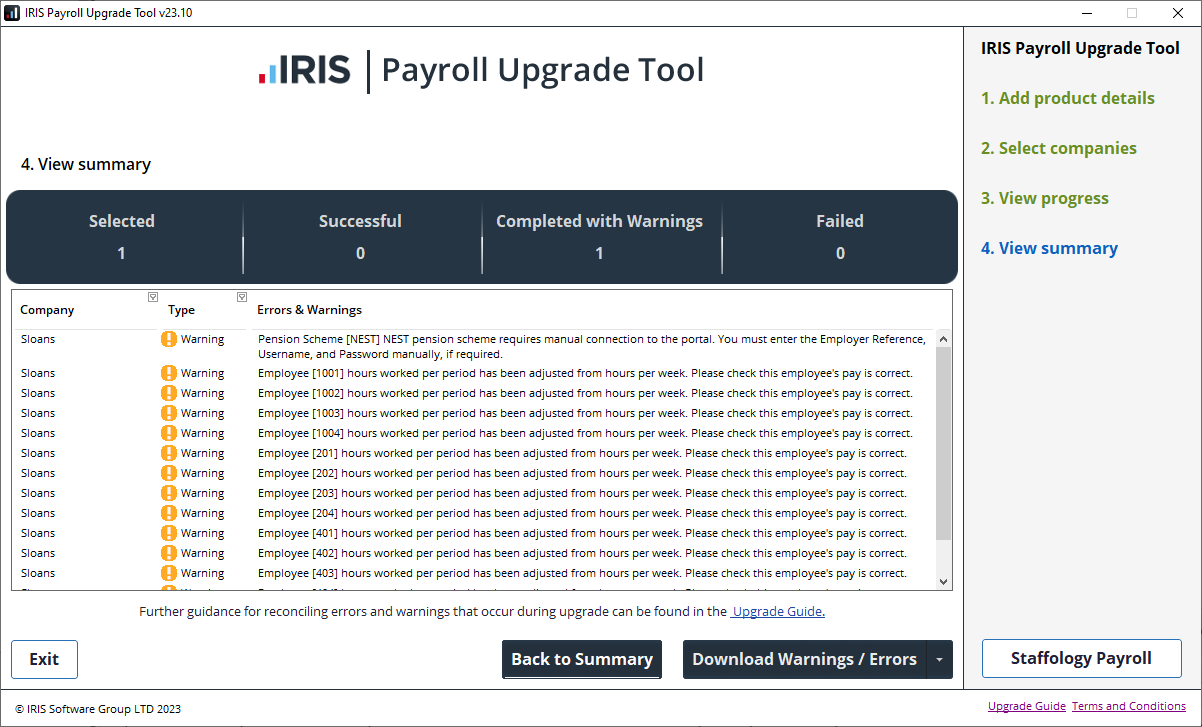
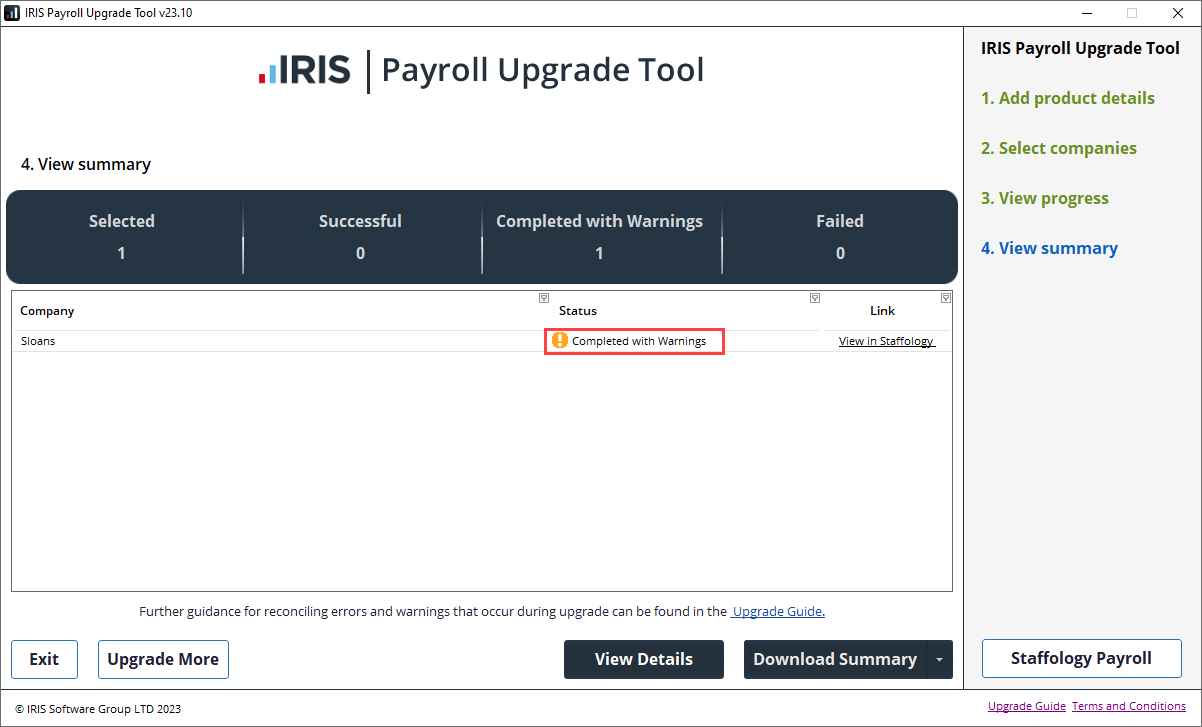
The view summary will display:
-
Selected: The number of companies chosen to upgrade.
-
Successful: The number of companies that have upgraded successfully.
-
Completed with Warnings: The number of companies that have upgraded, but some data may not have transferred to Staffology Payroll and will require amendment.
-
Failed: The number of companies that have not upgraded to Staffology Payroll because the process has failed or was canceled.
-
-
The list of companies will contain:
-
The company name.
-
The status of the company upgrade.
-
Select View Details for Errors and warnings.
-
-
A link to open the company in Staffology Payroll.
-
Select View in Staffology.
-
You can change the order of the information by selecting on the column header and filter the details.
-
-
Select Download Summary for a copy of the upgrade information.
-
Select Upgrade More to select more companies.
-
Select Exit to close.
We strongly recommend that you parallel run Staffology Payroll with IRIS 12 Pay for at least one payroll period after the upgrade. If this is not possible, check the first period’s figures thoroughly.
You can't parallel run payrolls with pay dates on or after 6th April.
Hit a bump during the upgrade?
-
What happens if you get any errors, warnings and upgrade information.