Assign the same Set Rights to multiple employees
This topic provides guidance on assigning the same Set Rights Set Rights are the system permissions you allocate to employees to control the information available to a user about other employees. permissions to employees when you do not have access to Set Rights Roles.
If your package does not include Set Rights Roles, you can use the Copy Rights From feature instead of manually updating each employee's Set Rights permissions.
However, you must create a Team Where Clause Allows you filter records using a specific criteria. with the Follow option selected in the record of the employee you want to copy. This ensures employees only access information they are permitted to view.
In this section:
-
Copy Rights from a line manager and assign them to another line manager.
-
Copy Rights from an employee and assign them to another employee.
Copy Set Rights from a line manager and assign them to another manager
To copy Set Rights from one employee to another, you need to create a Team Where Clause with the Follow checkbox selected. This ensures the system uses the information in the My Details tabs instead of a specified value.
For example, if you assign Set Rights to a line manager and create a Team Where Clause as TheLineManager = '{LineManager}', copying this line manager's Set Rights to another line manager will grant both access to employees who report to them. This works because the clause follows the information in the My Details > Contract > My Line Manager dropdown.
To assign the same Set Rights permissions to all line managers without needing to update their records individually:
-
Sign in to Staffology HR.
-
Go to Directories in the navigation bar.
-
Search for the required line manager and select their record.
-
Select Edit.
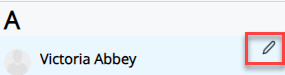
You can also select the Edit icon displayed on the line manager's name:
The line manager's record opens.
-
Select Personal.
-
Go to Actions and choose Set Rights.
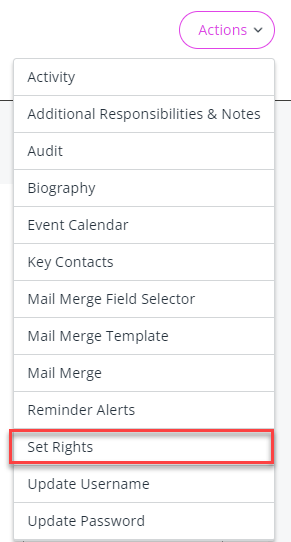
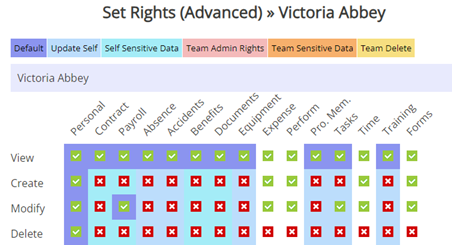
The line manager's Set Rights screen opens.
-
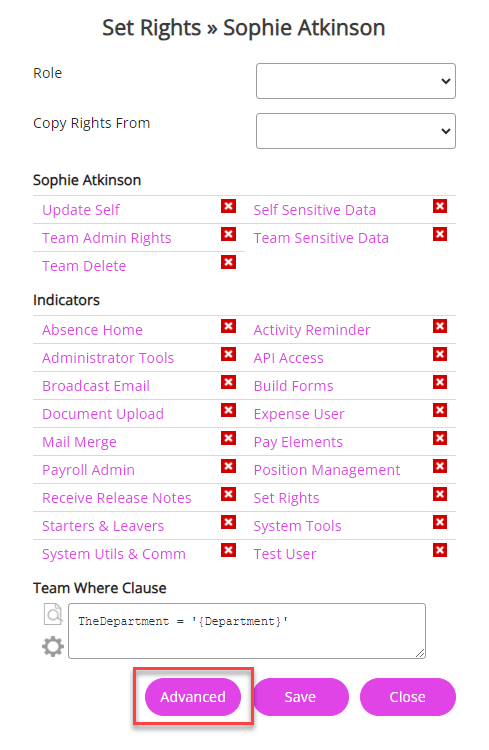
The line manager's self-rights displays under their name.
Selecting any of the indicators within the line manager's Self Rights section grants them full access to update these areas in their own record, and for others too. We recommend to use the Advanced option to manage this area, for a more detailed selection of areas for updating both their own and others’ records.
Learn more about these Self Rights indicators.
-
Select the checkboxes within the Indicators section to give the line manager access to these system areas.
Refer to the Indicators section in the Basic Set Rights topic for more information and return to this topic after you have done this.
Build a Team Where Clause with the Follow option
-
In the Team Where Clause section, select the Builder icon:

-
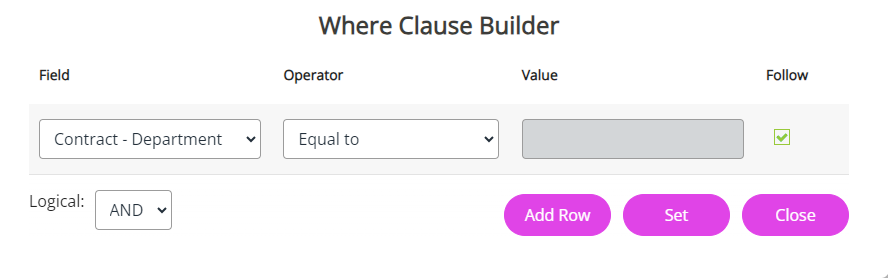
The Where Clause Builder screen opens.
This is where you add the criteria so that when you copy this line manager's Set Rights to another line manager, they both receive Group Absence When an employee or worker is absent from work. This can be for a variety of reasons. Calendar access to view information for employees who report to them.
You then grant line managers access to View, Create, Modify or Delete information in employees' My Details tabs by selecting the indicators in the Advanced Set Rights section. But first you need to build the clause:
-
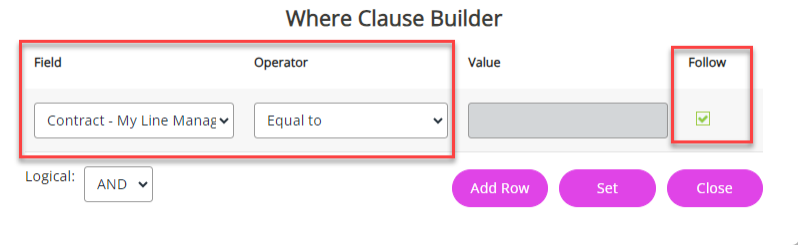
From Operator, choose Equal to.
-
Do not select a Value.
-
Select the Follow checkbox.
Creating a clause for TheLineManager = '{LineManager} grants line managers access rights to the records for employees reporting to them. But you must remember to choose the line manager's name from the Contract > My Line Manager dropdown in an employee's record for this to work.
-
You have two choices for the next step:
-
Enable the line manager to view absence information for employees who report to them by using the TheLineManager = '{LineManager} only. This clause on its own does not grant the line manager access to view their own absences When an employee or worker is absent from work. This can be for a variety of reasons. in the calendar.
To activate this Where Clause, follow steps 11- 14 in this section and select Set.
or
-
Add a further row to include TheEmployeeNumber = '{EmployeeNumber}' clause to allow the line manager to view their absences in the calendar.
To activate this Where Clause, follow steps 11- 14 in this section and then:
-
Set the Logical dropdown to OR.
-
Select Add Row.
-
From Field, choose Personal - Employee Number.
-
Set Operator to Equal to.
-
Do not enter a Value.
-
Select Follow.
-
Select Set.
-
-
-
The Team Where Clause field updates showing the criteria.
-
Select Save.
Advanced Rights
-
Reopen the line manager’s Set Rights and select Advanced.
You must Save before selecting Advanced otherwise the system will not save the Team Where Clause.
-
Select the indicators in the line manager's self rights (indicators shown under their name) to give them access to View, Create and Modify their own information in their My Details.
Team Rights
-
The Team Rights > Where Clause should have populated with the criteria you added in the first Set Rights screen.
-
In Team Rights, select the indicators to give the line manager access to the My Details tabs of employees who report to them and allow them to complete actions in these tabs.
Further information on assigning Advanced Set Rights.
-
In the Team Rightssection, in the Absence column, make sure to select the View indicator to allow the line manager to view their direct reports in the Group Absence Calendar.
-
If you do not select Absence > View, the line manager can only access non-sensitive absence information for their direct reports.
-
-
Select Save and Save again.
-
You can now copy this line manager's Set Rights to another line manager.
Copy Set Rights from one line manager to another
-
Go to Directories in the navigation bar.
-
Search for the required employee and select their record.
-
Select Edit.
The employee's record opens.
-
Select Personal.
-
Go to Actions and choose Set Rights.
The employee's Set Rights screen opens.
-
Select the Copy Rights From dropdown and choose the line manager to copy the rights from.
The screen updates with the rights you have copied.
-
Select Save.
By adding a Team Where Clause with the Follow option selected in the copied line manager's record, this line manager has the appropriate access permissions to employees who report to them. This is because the system 'follows' the information entered in the My Details > Contract > My Line Manager dropdown.
If you chose to add another row in the Where Clause for TheEmployeeNumber = '{EmployeeNumber}' with the Follow option selected, the system will ‘follow’ the Employee Number entered in the line manager's My Details > Personal > Employee Number, allowing the line manager to view their absences in the group calendar.
Assigning Set Rights with the Follow option - standard employee
-
Sign in to Staffology HR.
-
Go to Directories in the navigation bar.
-
Search for the required employee and select their record.
-
Select Edit.
You can also select the Edit icon displayed on the employee's name:
The employee's record opens.
-
Select Personal.
-
Go to Actions and choose Set Rights.
The employee's Set Rights screen opens.
Team Where Clause
You only need to add a Team Where Clause if you want to grant employees access to view the Group Absence Calendar.
-
In the Team Where Clause section, do one of three options:
-
Leave the Team Where Clause blank to not allow employees access to the Group Absence Calendar.
If you have made any changes on this Set Rights screen, select Save, reopen this screen from Actions > Set Rights, select Advanced, and go to Step 17.
-
Add 1=1 to allow employees to view non-sensitive absence information in the Group Absence Calendar for everyone in the company. If you choose this option, go to Step 15.
-
Select the Builder (cog icon) and add a clause to only allow employees to view non-sensitive absence information for employees in their department. If you choose this option, go to Step 8.
-
-
The Where Clause Builder screen opens. Using the fields on this screen, add criteria to allow the employee to view information for their colleagues in their department.
To do this:
-
From Operator, choose Equal to.
-
Do not select a Value.
-
Select the Follow checkbox.
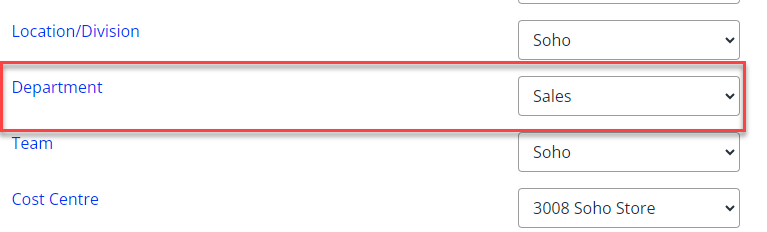
Selecting the Follow checkbox means that the system 'follows' the option you choose from the Field dropdown.
So, if a standard employee moves from Marketing to Sales, when you update the employee's Contract > Department to Sales, their Group Absence Calendar access permissions also update.
The absence information the employee can view about other employees in the calendar depends on the indicators you have set in the Advanced section > Team Rights > Absence column .
We recommend adding a Team Where Clause without selecting any of the Absence indicators for a standard employee, as this grants access to non-sensitive absence information about other employees.
-
Select Set.
-
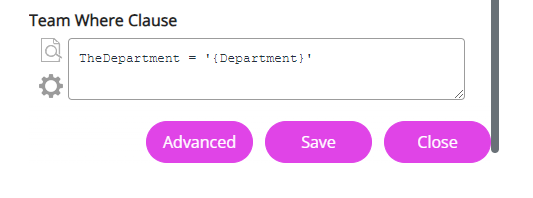
The Team Where Clause field updates with the criteria.
-
Reopen the employee's Set Rights, but this time choose Advanced.
-
Within the employee's self-rights (the table under their name), select the indicators to give employees access to View, Create or Modify information in their My Details tabs.
-
We advise giving employees Delete permissions for their personal information only. This is to prevent employees deleting important information from other My Details tabs.
-
The Delete option for the Personal tab allows the employee to delete the Key Contacts only.
Depending on the permissions set, the employee may modify or remove important details. We recommend setting up an Update Email alert in System Configuration so that an admin receives a notification if an employee deletes anything important.
-
-
Standard employees usually do not need Team or Secondary Rights so do not select the indicators in these sections.
-
Select Save and Save again.
You can now copy this employees Set Rights permissions to another employee.
Copy Set Rights from one employee to another
-
Go to Directories in the navigation bar.
-
Search for the required employee and select their record.
-
Select Edit.
The employee's record opens.
-
Select Personal.
-
Go to Actions and choose Set Rights.
The employee's Set Rights screen opens.
-
Select the Copy Rights From dropdown and choose the employee to copy the rights from.
The screen updates with the rights you have copied.
-
Select Save.
If you added a Team Where Clause for TheDepartment = '{Department}', both employees will have access to view non-sensitive absence information in the absence calendar for employees in their respective teams. This is because you set the clause to 'follow' the information in the Department field instead of specifying a Value.