Add an employee absence such as sickness or edit an absence duration
Only system admins or line managers (providing they have the View, Create and Modify Set Rights permissions assigned) can complete the actions in this section.
Depending on the configuration of your system, you can either add an absence When an employee or worker is absent from work. This can be for a variety of reasons. via the employee's record or the employee can add the absence themselves by creating a Self Certify Sickness for their line manager/approver to authorise.
Find out how to enable the Self-Certify Sickness feature so that employees can add sicknesses themselves in the system.
In this section:
Adding an employee absence (sickness)
These steps are based on adding a sickness absence in an employee's record, but you can follow the same steps when adding any other absence type.
-
Sign in to Staffology HR.
-
Go to Directories.
-
Search for the required employee and select their record.
-
Choose Edit.
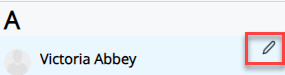
You can also select the Edit icon displayed on the employee's name:
-
Go to the employee's My Details > Absence.
-
Select Create New.
The Absence screen displays.
-
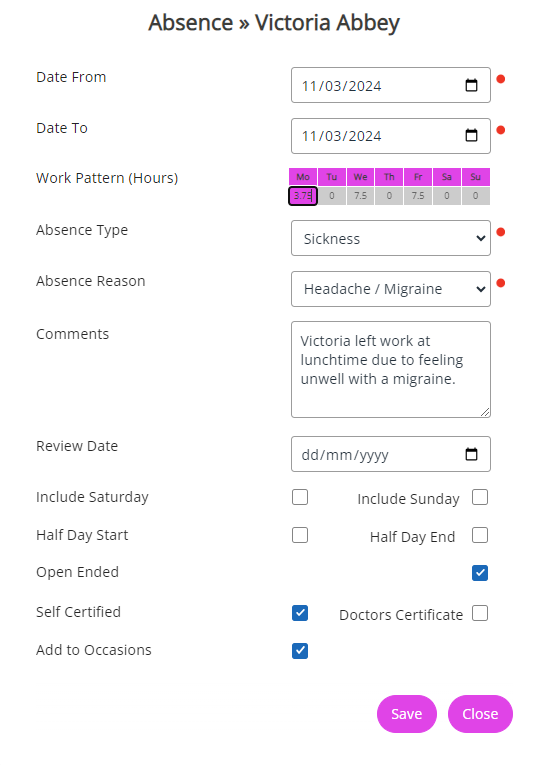
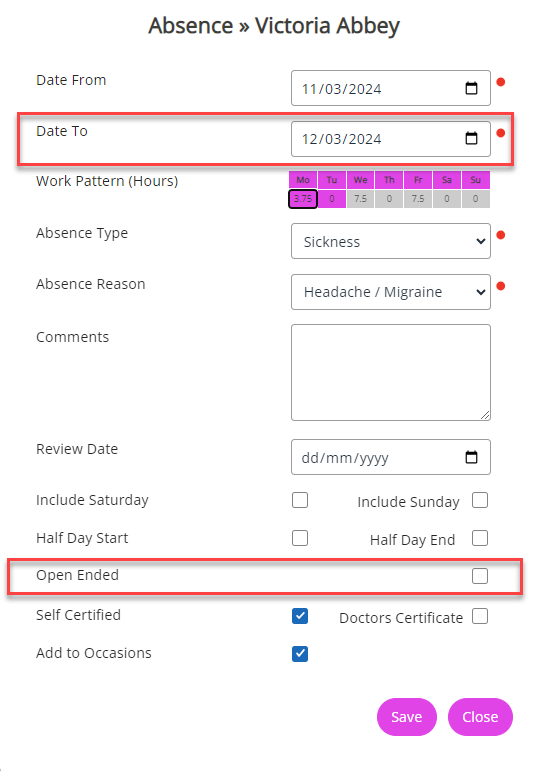
Enter when the employee's absence started in Date From (mandatory field).
-
If the employee has given you a date when they are to return to work, enter this in Date To (mandatory field).
If the employee has not given you a return date, enter today's date and select the Open Ended checkbox. Refer to Step 16 for more details.
Work Patterns
-
The options shown on the Absence screen differ depending on if the employee is on a Direct Entry Work Pattern For employees who do not work the conventional full-time, permanent working hours (Monday-Friday, fixed-hour arrangement). When enabled in the system, it allows employees to add an absence in hours or days.:
-
If the employee is on a Direct Entry Work Pattern, For employees who do not work the conventional full-time, permanent working hours (Monday-Friday, fixed-hour arrangement). When enabled in the system, it allows employees to add an absence in hours or days. go to Step 9.
-
If the employee is not on a Direct Entry For employees who do not work the conventional full-time, permanent working hours (Monday-Friday, fixed-hour arrangement). When enabled in the system, it allows employees to add an absence in hours or days. Work Pattern and works the standard Monday-Friday, fixed hour pattern, go to Step 11.
-
-
If the employee is on a Direct Entry Work Pattern, a Work Pattern (Hours)/(Days table displays, showing the dates affected by their absence.

To set up Direct Entry, go to System Tools > Utilities > Tools > System Configuration, Contract and select the Work Patterns (Direct Entry) For employees who do not work the conventional full-time, permanent working hours (Monday-Friday, fixed-hour arrangement). When enabled in the system, it allows employees to add an absence in hours or days. checkbox.
-
Amend the figures in the calendar if required. For example, the employee usually works a 7.5-hour day, but they left work at lunchtime as they were feeling unwell.
So, in this case, you would add 3.75 (if the employee is on a hours-based work pattern) in the Mo [Monday] column in the table.
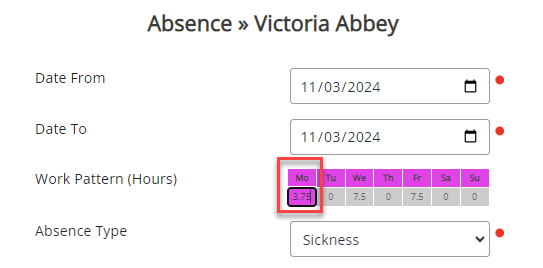
You can also select Half Day Start and Half Day End checkboxes.
If the system does not allow you to adjust the work pattern calendar, you may need to create the absence first and then update the duration. Refer to Amend a Work Pattern for more details.
-
Choose an Absence Reason from the dropdown (mandatory field).
-
Add any notes about the employee's absence in the Comments field (optional)
-
Add an absence Review Date (optional).
-
Select Include Saturday and Include Sunday checkboxes to include these days in the absence (optional).
Ignore these checkboxes if the employee is on a non-standard work pattern and you have amended the Work Pattern (Hours)/(Days) calendar.
-
Select Half Day Start and Half Day End checkboxes if the employee only took a half-day absence (optional).
Ignore these checkboxes if the employee is on a non-standard work pattern and you have amended the Work Pattern (Hours)/(Days) calendar.
-
If the employee has not given you a return date, select the Open Ended checkbox (optional).
Remember to deselect this checkbox after the employee has returned to work; otherwise the system assumes the employee is still absent and updates the Date To field every day it presumes the employee is absent. Find out what you need to do to remove the Open Ended checkbox.
-
Select the Self Certified checkbox if the employee has not provided formal documentation from a doctor etc to support their absence.
-
Select the Doctors Certificate checkbox if the employee has provided medical documentation.
-
Select Save after adding all of the absence details.
-
The absence shows in the employee's Absence tab.

-
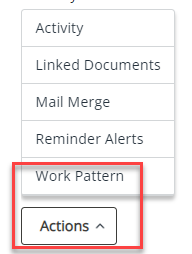
In the employee's My Details > Absence tab, select the absence.
-
Choose Actions > Work Pattern.
-
A screen showing the employee's Work Pattern opens.
-
On the required day, amend the figure to show the duration of hours/days the employee was absent from work.
For example, if an employee usually works a 7.5-hour day but left work at lunchtime on a Monday due to sickness, you would add the number 3.75 in the Monday column of the Sickness table.
Amending the employee's work pattern in their record does not update the original Work Pattern recorded in their Contract tab. The system only updates the Work Pattern for the specific absence.

-
The absence updates in the employee's record showing the amended number in the Duration column.
-
You have successfully updated the absence record with the correct number of days/hours of absence.
Amend a Work Pattern
If the absence duration is incorrect after adding an absence in an employee's record, you can update the employee's work pattern.
To amend the absence duration:
Removing the Open Ended checkbox when an employee returns to work
If you have created an absence for an employee with the Open Ended option selected, you must remember to remove this and amend the absence dates once an employee has returned.
To do this:
-
Select the required absence in the employee's record.
-
Deselect the Open Ended checkbox.
-
Amend the Date To field to the employee's last day of absence.
So, if the employee's absence is showing from 11/03/24 to 13/03/2024 but they returned to work on the 13/03/2024, you would need to amend the figure in the Date To field to the 12/13/2024 as this is when their absence ended.
-
Select Save.
-
The absence record updates.