Step 1: Create a Workflow
Screenshots are taken from a test system and may not match your system exactly.
Step 1: Create a Workflow | Step 2: Create a Task | Step 3: Create a Multi-step Workflow - optional
-
Sign in to Staffology HR.
-
Go to System Tools > Utilities > Tools > Workflow.
-
Select Create New Workflow.
-
Enter a memorable Name for the Workflow, such as ‘New Starter Workflow’.
-
Select the Category to identify where you want to save the workflow.
-
Use the Where Clause function to restrict who receives a trigger from the workflow. If you leave this blank, the workflow works for all employees.
-
You could use this to create different workflows for different job types or departments.
-
-
Select the workflow trigger you want to assign to the tasks. Choose either Absence When an employee or worker is absent from work. This can be for a variety of reasons., Leaver, New Starter, or Schedule.
-
Absence - triggers the tasks when entering a new Absence record.
-
Leaver – triggers the tasks when creating a Leaver.
-
New Starter – triggers tasks when adding a new employee.
-
Schedule – triggers tasks according to the Date field selected.
For more information on the Schedule option, refer to Scheduled Trigger.
-
-
Select the Active checkbox to make the workflow live.
-
Choose Save.
Scheduled Trigger
Scheduled triggers trigger workflows based on date fields within the system. When a date is due, the workflow process triggers to ensure all necessary tasks take place.
You can set up the trigger using how many days/weeks until the date is due. Scheduled triggers use the same dates available in AENs.
-
Scheduled trigger option is available when creating a workflow.
-
When selecting the Schedule trigger, additional fields appear Field, Track By, Offset, and Anniversary.

-
Field, Track By, and Offset are all mandatory.
-
After assigning the workflow to a Schedule trigger, the workflow then triggers when an employee/group of employees meet the criteria specified within the trigger.
Manual Trigger
Only workflows with a New Starter or Leaver trigger have the Start Workflow functionality.
To manually trigger the workflow:
-
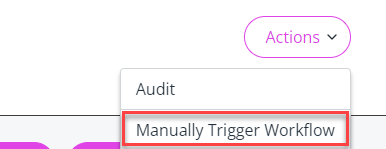
After selecting a specific Workflow, in Actions, choose the Manually Trigger Workflow option.

-
Choose the required employee(s) from the Employee Selector.
-
On the Employee Selector, select Start Workflow.
-
A prompt appears asking you to confirm you want to continue.
-
Once complete, a message displays confirming the activation of the workflow.