Step 2: Create a Workflow Task
Step 1: Create a Workflow | Step 2: Create a Task | Step 3: Create a Multi-step Workflow - optional
Screenshots are taken from a test system and may not match your system exactly.
-
Sign in to Staffology HR.
-
Go to System Tools > Utilities > Tools > Workflow.
-
Select the Workflow you want to add a task to.
-
Choose Create New Task.
The Group dropdown populates with the name of the Workflow.
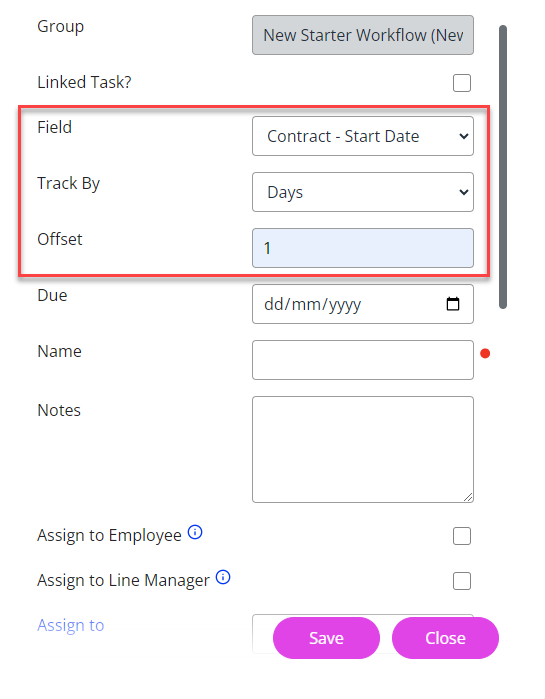
Next, we are going to deal with the timing of the task. Three fields determine this; Field, Track By, and Offset.
-
For example, you may want to create a task to ask new employees to check/update their details.
To do this:
-
In the Field dropdown menu, select the Date Field you want to use to trigger the task.
-
This field, along with Track By and Offset determines when the system sends the Task.
Here we are going to use Contract – Start Date.

-
-
Next, select whether you want to Track the task by Days, Weeks, Months, or Years.
-
In our example, we are going to Track by Days, as we want to send the task a certain number of days after the Contract – Start Date of each new starter.
-
-
In Offset, enter the number of units you want to ‘offset’ the task by (e.g. a number of days if you selected to track the task by Days).
In our example, we will enter ‘1’, which means our task triggers 1 day after the Contract Start Date of every new starter. Alternatively, we could set it to ‘0’ to trigger it on the Contract - Start Date or ‘-3’ to send it 3 days before the Contract - Start Date.
If setting up a task with a workflow trigger, you do not need to enter a Due Date. Also, you cannot save a Due Date when adding an entry in Track By and Offset.
-
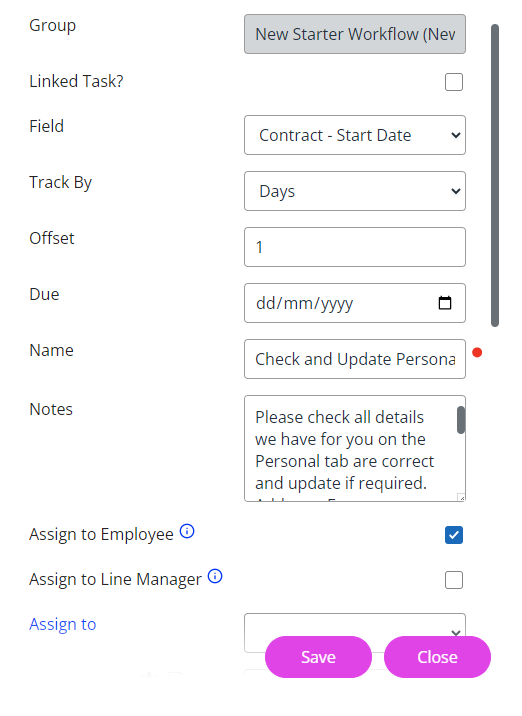
With the timing set, in the Name field, enter the name of the Task.
Make this descriptive as the employee sees this. An example of a task name is 'Check and Update Personal Information'.
-
Enter the task details in the Notes field.
-
Ensure to provide detailed instructions to the task recipient. For example,
‘Please check all details we have for you on the Personal tab are correct and update if required. Add your Emergency Contact Details and ensure to complete all mandatory fields (those marked with a red dot). At the bottom of the task, select Available Actions to open the right screen.'
-
-
Next, Assign the Task. There are four options to choose from:
-
Assign to Employee – this assigns the Task to the employee who has triggered the workflow, e.g., the New Starter (if you have used the New Starter trigger).
-
Assign to Line Manager – assigns the Task to the Line Manager of the employee who has triggered the workflow, e.g. the New Starter’s Line Manager.
-
Assign to – allows you to select a specific employee from the dropdown list.
-
Where Clause Allows you filter records using a specific criteria. – allows you to assign the Task to more than one employee using a criteria. For example, all employees with a ‘Job Type’ ‘Equal to’ ‘HR Assistant.

-
-
If you are using an Absence When an employee or worker is absent from work. This can be for a variety of reasons. trigger, select Trigger Once.
Only select this indicator when you want to send the Task after creating the Absence, and providing that you do not plan to resend if you add information or update the end date.
-
Use Link To to direct the task recipient to a tab to complete a particular action.
-
For example, you may want the employee to check their personal details are correct on the Personal tab as part of the task, then…
-
-
Use Link To Action to specify what you want the task recipient to do on the previously selected tab.
The Actions available (depending on the tab you select) are:
-
View – the recipient must view the tab. This task does not automatically mark as Complete. The recipient must return to the task and select the Complete box.
-
View & Complete - the recipient must view the specified tab. The Task marks as Complete when the recipient views the tab.
-
Create - the recipient must create a new record on the selected tab, ensuring to complete all mandatory fields before saving.
The Task marks as Completeonce saving the record. The task recipient cannot save the record (and complete the task) until they have completed all mandatory fields. If you select this option, the Task setup window displays a list of Available Fields on the linked tab. Here you can set the required fields as mandatory.
Any existing mandatory fields also display. Select the fields you want to make mandatory. These fields then move across to the Selected Mandatory Fields column.
-
Modify - the recipient must view the tab and modify some information on it. This Task automatically marks as Complete upon saving the record.
-
-
To keep track of your workflows and ensure they run smoothly, you can arrange for notification emails to send to different users upon completion of the Tasks.
There are several options. You can use one, all, or a combination of these:
-
Employee – select a specific employee to receive the email.
-
Line Manager – notifies the Line Manager of the employee that triggered the Task.
-
Where Clause – to create a specific group of employees to notify, e.g. all HR Assistants.
-
Email Address – sends the notification to the email address you specify here.
-
-
Lastly, when you are ready to make the task active, select Active. The workflow then starts triggering.
-
Select Save.
-
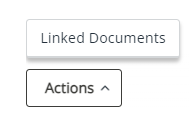
After saving, to attach a Document to the Task, select its name from the list and choose Actions > Linked Documents > Create New.

-
Select Choose File, browse to the file you want, select Upload, and then Close.
-
Choose Save.
Once you are happy with the setup, we recommend testing each Workflow to ensure they work as planned and contain enough information for the recipients. Do this by adding a test new starter etc.