Create a Set Rights Role for employees
Screenshots are taken from a test system and may not match your system exactly.
-
Sign in to Staffology HR.
-
Go to System Tools > Utilities > Company > Set Rights Set Rights are the system permissions you allocate to employees to control the information available to a user about other employees. Roles.
-
Select Create New to open the Set Rights screen.
-
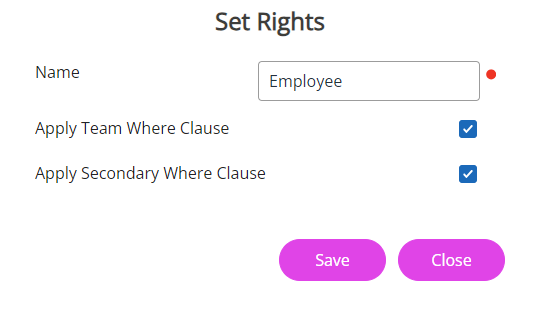
Enter a name for the new Set Rights role, for example, Employee.
-
Select the Apply Team Where Clause Allows you filter records using a specific criteria. and Apply Secondary Where Clause checkboxes to ensure any Where Clauses added to the role apply when assigned to employees.
If you select these checkboxes, any existing employee Where Clauses will be overwritten once you assign a role to them.
-
Select Save.
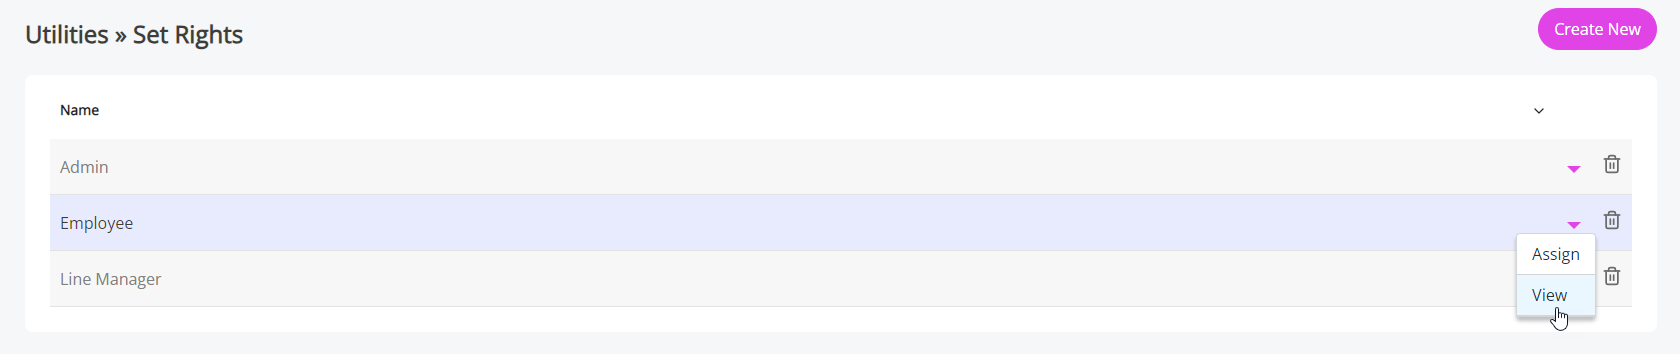
You should see the new Set Rights role in the list.
-
Select the arrow beside the role entry and choose View.
-
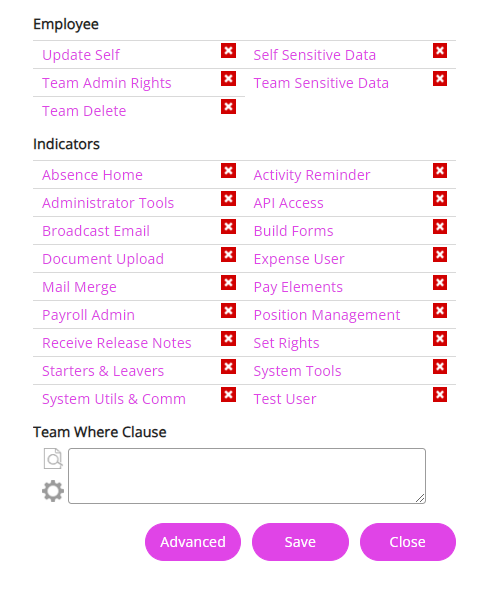
The same Set Rights screen that displays when configuring Set Rights for an individual employee appears.
-
As this role is for a standard employee, most of the checkboxes under the Indicators section do not apply, except for Document Upload which allows an employee to add documents into the system. Go to step 10 if you do not want to set this permission for employees.
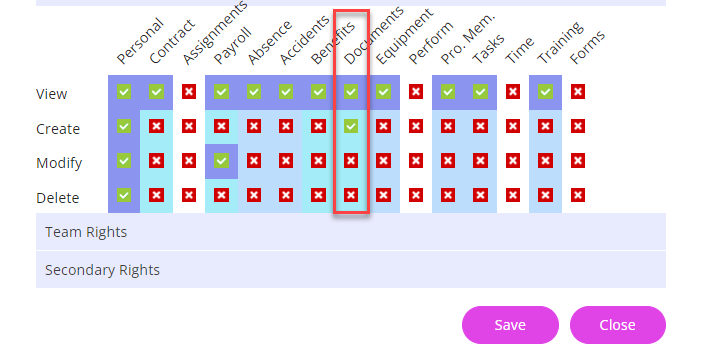
To give employees permission to upload documents in their My Details > Documents, from the Indicators section, select Document Upload. In the Advanced settings, go to self-rights (the table shown under your name) and in the Documents section, choose the View and Create checkboxes. Select Save.
-
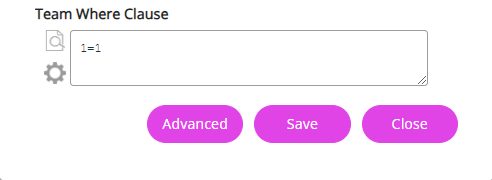
To allow employees to access to the Group Absence When an employee or worker is absent from work. This can be for a variety of reasons. Calendar, you need to create a Team Where Clause.
On the main Set Rights screen, in the Team Where Clause field, enter 1=1 to give employees access to non-sensitive absence information in the Group Absence Calendar for everyone in the company.
If you want to assign this role to a specific group of employees, for example, all employees in a department, you can create a Team Where Clause to only allow employees to access non-sensitive absence information for people in their department.
Refer to list number 7 in Give a standard employee access to the Group Absence Calendar for information on how to do this.
If you have added a Team Where Clause
-
Choose Save, reselect the dropdown arrow on the role and select View.
-
Choose Advanced on the Set Rights screen.
-
Go to step 11.
If you have not added a Team Where Clause
-
Select Advanced on the Set Rights screen.
-
Go to step 11.
-
-
In the first section, configure the information employees can see in their My Details tabs.
Standard employees generally do not need Team or Secondary Rights, so do not select any indicator under these headings as you may give employees access to system areas which they do not need access.
-
After updating employees' My Details permissions, select Save and Save again on the main Set Rights screen.
You have successfully created an employee role and are ready to assign it to individuals or groups of employees using the Employee Selector. Refer to Assign Set Rights Roles for information on assigning roles.