Getting started if you are an existing HR or Payroll customer
-
This section explains how to set up the integration between Staffology HR and Staffology Payroll and sync your information between the systems.
-
Screenshots are taken from a test system and may not match your system exactly.
In this section:
Payroll users - pre-integration steps
Activate the Company checkbox
Before integrating your Payroll system with HR, you need to complete some steps in Staffology HR:
-
Sign in to Staffology HR.
-
Go to System Tools > Utilities > Tools > System Configuration.
-
In the Contract section, select the Company Field checkbox.

-
Select Save.
Create a Company
-
Go to System Tools > Lookup Tables > Contract.
-
From the list, select Company.
-
Select Create New.
-
In Lookup, enter the name for your payroll company.
-
Select Save.
The company you added will now appear in the list. To add another company, select Create New. Otherwise, start the integration.
HR users - pre-integration steps
For the integration to work, these fields must be populated in HR in each employee's record:
If you have already imported data for these fields in your system, you can start the integration. However, if you are unsure, we recommend running a Quick Query first. Once you are confident all required fields are populated, you can start the integration.
Run a Quick Query (Ultimate, Professional, and Essential packages)
If you are a Foundation user, you cannot use the Quick Query feature. Instead, you must check/update fields in an employee's record manually.
To verify that all employees in your organisation have the necessary fields populated in their record so that you can integrate your system with Payroll, run a Quick Query.
To do this:
-
Go to System Tools > Exports & Reports > Quick Queries.
-
Select Create New.

-
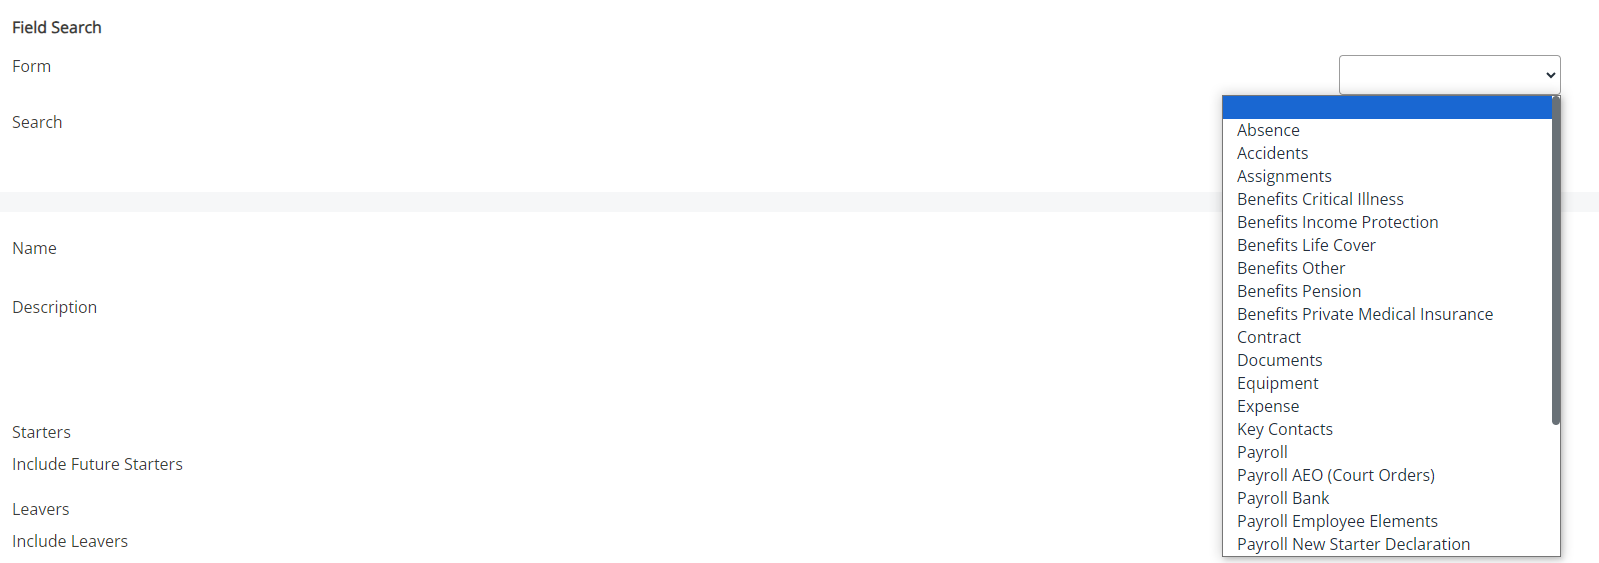
In the Form dropdown, select Personal. This relates to the Personal tab found in My Details.
-
In the Search Results, select Forenames and Surname.
-
Using the Form dropdown again, select Contract.
-
In the Select Fields section, select Company.
-
The Selected Fields section updates with your chosen fields.

-
Repeat the same steps to include all fields in the query using this table as a guide.
-
Using the up/down arrows, rearrange the order of the fields, if necessary.
Rearranging the fields allows you to change how the fields display in the output.
-
Enter a name for the Quick Query.
-
Select a Category for the query. To add more options in the drop-down, select the word Category and enter a name in Lookup.
-
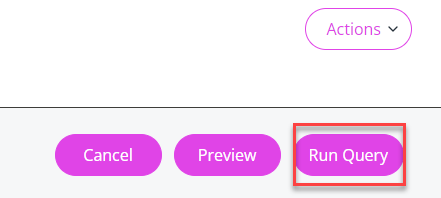
Scroll up the page and select Run Query in the top right corner.
A table displays showing a list of employees and all the fields you chose in the query.

-
Select Actions > Export to Excel to view an output of the data and identify the missing fields in employees' records.
Save the query
-
To save the query, close the Run Query window if you have it open and at the end of the query screen, enter a Name and choose a Category.
To add another Category, select the word Category and add a Lookup.
-
Select Save.
If all fields required for the integration are populated, you can start the integration. If not you will need to activate the Company option in Staffology HR, create a company, and update employees' records.
Activate the Company checkbox
-
Sign in to Staffology HR.
-
Go to System Tools > Utilities > Tools > System Configuration.
-
In the Contract section, select the Company Field checkbox.

-
Select Save.
The Company field is now active.
Create a Company
To create a payroll company:
-
Go to System Tools > Lookup Tables > Contract.
-
From the list, select Company.
-
A list of company names displays in a list, showing ones you have already created.
-
-
Select Create New.
-
In Lookup, enter your payroll company name.
-
Select the Directory Lock checkbox to limit employee access to viewing information about other employees in Directories. This ensures employees can only access records of those working in the same company as themselves.
-
If no directory lock is applied, employees can view other employees' records regardless of their company.
-
-
Select Save.
The company you created will now display in the list.
Updating HR fields needed for integration
Ultimate, Professional, and Essential packages
Most fields that need to be populated in employee records must be updated manually since they are personal. However, if you have Ultimate, Professional, or Essential, version of Staffology HR, you can mass update the Company field in multiple employees' records at once.
Individual updates
-
To update a field in individual employees' records, refer to update an employee's record.
Mass employee updates
-
To mass update the Company field for employees who do not have this field populated in their record, refer to the Employee Selector section.
Foundation package
Individual updates only
-
You must update all fields in each employee's record individually before completing the integration.
Employee Selector
Ultimate, Professional, and Essential packages only
-
If all employees in your system work for the same company, go to Step 14, but if the employees work for different companies, continue to Step 8.
-
Select Actions > Employee Selector.
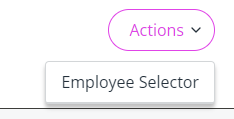
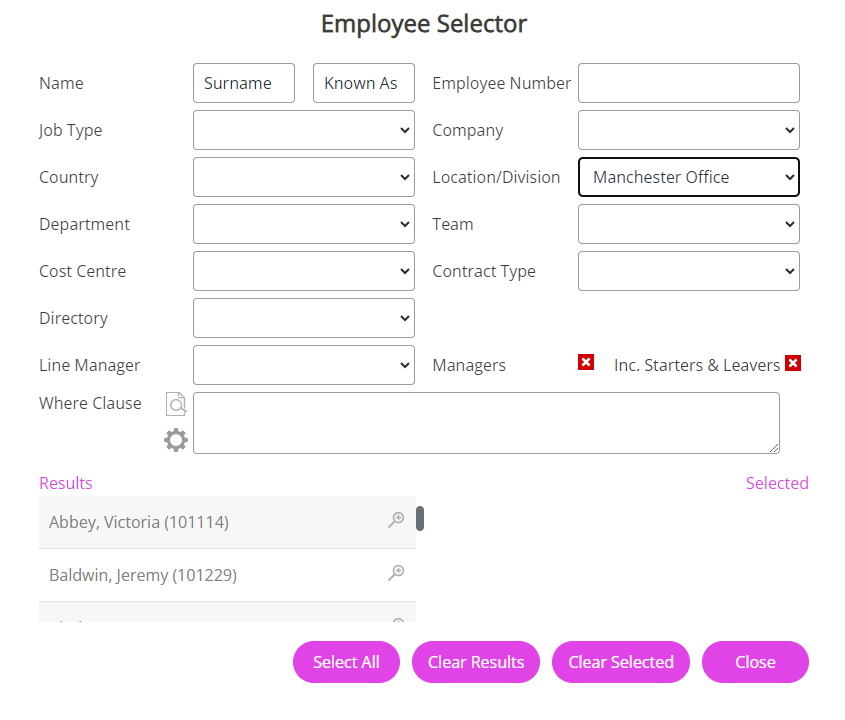
The Employee Selector allows you to choose a group of employees so that you can update their Company field at the same time.
-
Complete the screen fields to filter employees.
For example, if all employees in the Manchester office work for the same company, select Location/Division and choose Manchester.
Find out how to use the Employee Selector.
-
The Results column populates with employees who match the criteria you chose.
-
Choose Select All and then Close the Employee Selector.
-
The Employee Selector will display as active in the top right navigation menu.

Open the Lookup Replacement screen
-
Go to System Tools > Utilities >Tools > Lookup Replacement.
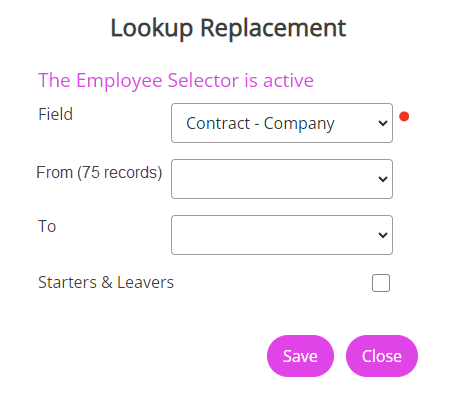
The Lookup Replacementscreen allows you to mass update fields in the Personal and Contract tabs.
-
From Field, select Contract - Company.
-
The From dropdown updates and shows how many employees do not have a company assigned in their Contract tab.
-
-
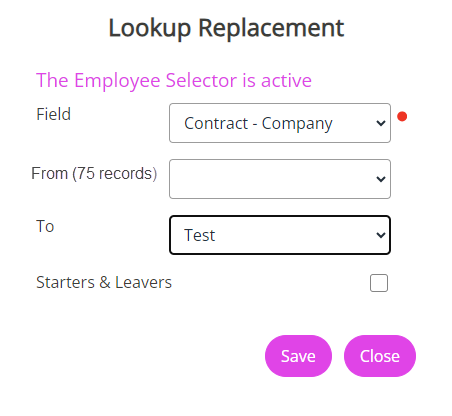
From the To dropdown, choose the company you want to assign to the selected employees.
-
Select Save.
-
Select the Employee Selector in the top right navigation menu.
-
Choose Clear Selected and then Close.
Your selected employees are now assigned to the correct company. You can begin the integration or check an employee's Contract tab to ensure they are assigned to the expected company.
Update the fields in an employee's record
To update/check the fields in an employee's record:
-
Go to Directories.
Ultimate, Professional, or Essential packages
-
Search for the required employee and select their record.
Foundation package
-
Select the first employee's record in the list.
-
-
Select Edit (or the edit icon next to the employee's name).

-
Update the field's in the employee's record using this table as a guide.
-
Save your changes.
To check the next employee, use the arrows at the top right of the screen to open their record and repeat the steps.

You can now start the integration.
Set up the integration
Existing Staffology HR users, are you sure all employee records in your system have the fields listed in this table populated?
Create an API Key
You must generate an API key in Staffology Payroll to complete the integration.
-
Sign in to Staffology Payroll.
-
Navigate to the top right of the screen, select your initials, and then choose API Keys from the dropdown menu.
If you already have an API created, this will display.

-
To create a new Key, enter a name and select Create Key. Highlight and copy the key number displayed (you need this to link the systems). We recommend pasting the Key into a Word document.

Obtain the Employer ID
-
In Staffology Payroll, at the right of the screen, select your company name and choose Edit Details from the list.
-
In the Name & Address tab, find Employer Id, and select the copy icon to copy it.
-
Paste the ID into the same document you pasted the API Key.
Activate the Staffology Payroll checkbox in Staffology HR
-
In Staffology HR, go to System Tools > Utilities > Tools > System Configuration.
-
Within the Payroll Integration section, select Staffology Payroll.

-
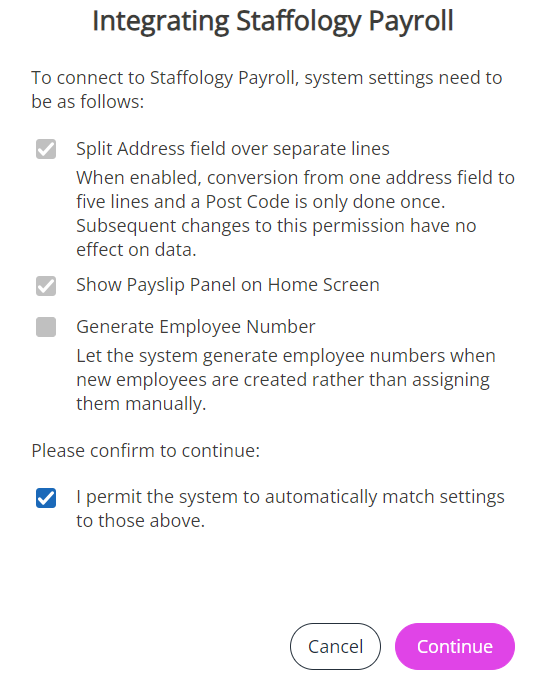
An Integrating Staffology Payroll screen opens. Select the bottom checkbox in the list and choose Continue.
-
Enter the API details you previously created in Staffology Payroll.
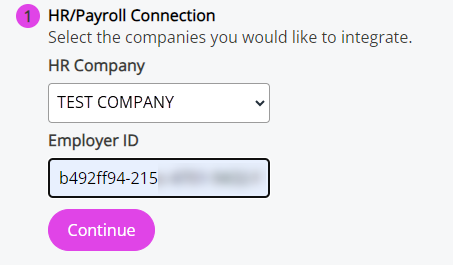
HR/Payroll connection
-
Select your HR Company and paste the Employer ID you copied from Staffology Payroll.
- Choose Continue.
-
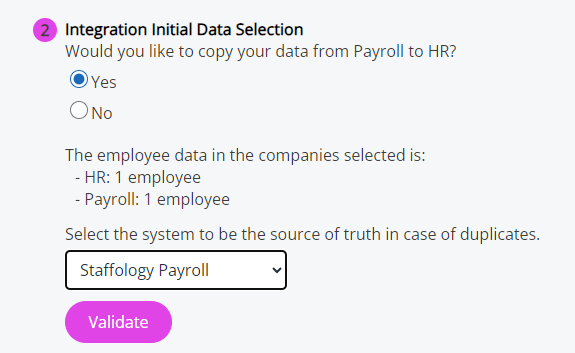
You are asked whether you want to copy your data from Payroll to HR:
-
Select Yes to copy data from Payroll.
-
Select No to make HR the primary system, meaning HR can overwrite payroll information.
-
If there are employees in both systems, a dropdown and message will display. Select the system you consider the source of truth.
It is recommended to choose the system with the most up to date information.
-
- Select either Link or Validate to continue.
-
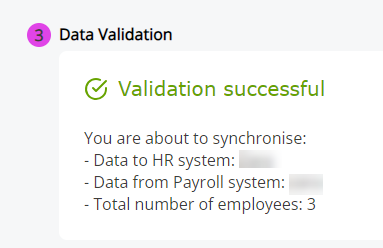
If you select Validate, the system checks your data to prevent errors importing.
-
If you select Validate, the system checks your data for errors before importing.
If errors are found, a downloadable report will show where corrections are needed before you can set up the link again.
-
If there are no errors, a message displays the number of employees and the companies to be linked.
-
-
To complete the integration of your HR software with Staffology Payroll, select Link Systems. The status will show as Connected.
You have successfully linked your HR and Payroll systems. Find out how to Match Payments with Pay Codes - Staffology Payroll
