Create a new payment or deduction, with or without linking to Payroll
This topic shows you how to add payments or deductions in Staffology HR.
-
Payments give money to employees, such as salary or bonuses
-
Deductions take money away, such as fees or repayments
You can follow these steps with or without a payroll integration.
Your screen may display different because your system setup can vary.
In this topic:
If you use Staffology Payroll:
If your system integrates with Staffology Payroll, you must link payments to pay codes. This link lets HR send pay details to Payroll correctly.
What you need to know
-
You must link new payments to a pay code
-
You do not need a pay code for a static salary
-
If you created payments before completing the payroll integration, you will need to link those payments to a pay code for them to send to Payroll. To do this:
-
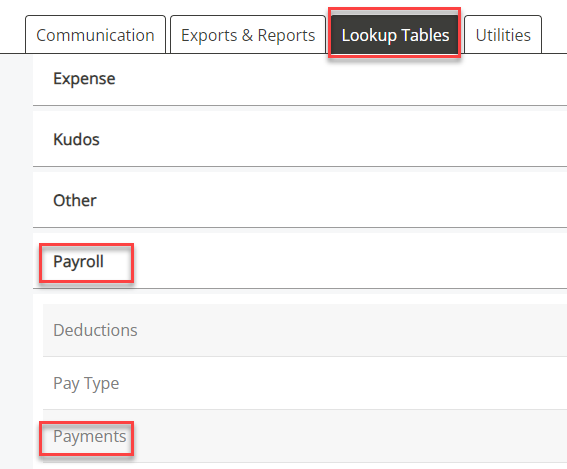
Go to System Tools > Lookup Tables > Payroll > Payments.
-
Choose the required payment.
-
From Pay Code, select the pay code created in Staffology Payroll.
-
Select Save.
-
The payment now syncs to Payroll.
-
-
You do not need to delete or re-add payments
Staffology Payroll users only
Create your pay codes in Staffology Payroll
Before creating a new payment or deduction, we recommend creating your pay codes in Staffology HR first.
If you have already done this, go to Create a payment.
-
Open Staffology Payroll.
-
Select the correct company.
-
Go to Settings > Pay Codes > Custom Codes > Add Pay Code.
-
The Create New Pay Code screen displays.
-
Enter a Code. You use this to link HR to Payroll.
-
Complete the screen fields as required.
-
Select Create Code.
-
The Pay Code adds to the list and displays in Staffology HR as an option from the Pay Code drop-down.
-
Create a payment
-
Sign in to Staffology HR.
-
Go to System Tools > Lookup Tables > Payroll > Payments.
-
If you have the Staffology Payroll integration, you can also open the Payments screen from System Tools > Utilities > Payroll > Staffology Payroll > choose a company from Company Integrations > Payments > Add Payments.
-
-
The Payments screen opens. This is where any payments you create display.
-
Select Create New.
Field What is does Payment fields Name Enter a name for the payment such as Salary or Bonus. Company
*Payroll integration only.
Your company name should display automatically.Pay Code
*Payroll integration only.
Choose a pay code from the list.
Learn how to create a pay code.Basis Choose how the system calculates the payment.
For example, if you have named the payment Salary, choose Amount from the drop-down.If you have the payroll integration, also select:-
Primary Basic Salary so that Basic Salary displays in My Details > Payroll
-
Include in Basic Salary so that results display in the report
You can only select Primary Basic Salary and Basic Rate in one pay element.
Type Choose whether this is a Static or Variable payment.Static
Use Static for payments that stay the same each pay period, such as a car allowance.
Variable
Use Variable for one-off or changing payments, such as a bonus or overtime.
A SSP field displays if you select Variable. This is for sickness payments.Salary options Primary Basic Salary Select this if you want to auto-populate Basic Salary in My Details > Payroll.Basic Salary does not update if you leave this checkbox deselected, only the Payments tab updates.You should only have one Primary Basic Salary and one Basic Rate set up.
Each employee should only have a Primary Basic Salary or Basic Rate, not both as this can affect other system areas.Include in Basic Salary
*Payroll integration only.
Select this checkbox to include additional salaries in the Basic Salary field.Basic Rate Select this if you want to auto-populate Basic Rate in My Details >Payroll.Only select this checkbox for hourly paid or hourly rate employees, not salaried.You should only have one Primary Basic Salary and one Basic Rate element set up. Each employee should only have a Primary Basic Salary or Basic Rate, not both as this can affect other areas of the system.
Negative Unit You can add a negative payment value to automatically reduce a payment without setting up a deduction element.For example, if you overpay an employee’s overtime, enter a negative value here. This makes sure the system deducts the overpayment from the employee's salary in the next pay period.You can also enter a negative deduction value to automatically increase an employee’s payment without creating an additional payment element.
For example, if you deduct too much from an employee for subscriptions or fees, the next time you pay the employee, enter a negative deduction value to refund the overpayment to the employee.
Reporting fields Gender Pay GapFor information on generating a report in your system, refer to creating a Gender Pay Gap Report or for further guidance, refer to the GOV.UK websiteExternal website.Include in Gender Pay Gap Select this to include the pay element in Gender Pay Gap reporting.Make sure to select Primary Basic Salary if you plan to create the Gender Pay Gap report to calculate your organisation's figures.
Include in Gender Bonus Gap Select this to include the pay element in Gender Bonus Gap reporting.Bonus Period (Days) If you selected Include in Gender Bonus Gap, enter the appropriate number of days here. SSP Type This checkbox displays when selecting Variable from the Type drop-down.Select this to indicate a statutory sick payment.Contact Support to build your sick payments into the system. If you are an IPP customer, you can add your own.
Rate Multiplier This allows multiplication of the rate.For example, if you were creating a payment for Overtime which payd double the rate, you would add 2.Or if the overtime rate is time and a half, you would add 1.5.If you have already set up a Time Rule for this payment, you do not need to add any information here.Output Position Appears in this column on the payment output CSV file in System Tools > Utilities > Payroll.External ID Enter any third-party ID used for the pay element when integrating with an external payroll software. -
-
Select Save to add the payment.
-
You can assign the payment to employees.
Create a deduction
-
Go to System Tools > Lookup Tables > Payroll > Deductions.
-
Select Create New.
-
Complete the fields. They work the same as payments.
Extra deduction option
Field What it does Default on Leaving Applies the deduction to the employee’s final pay. -
Select Save.
Related topics: