Create a disciplinary record for an employee
Use the Disciplinary feature to record disciplinary actions in an employee’s record.
HR teams usually create and manage disciplinary records. A system administrator controls access to the Disciplinary tab using Set Rights Set Rights are the system permissions you allocate to employees to control the information available to a user about other employees. permissions.
Before you create a disciplinary record, the system administrator must activate the Disciplinary tab for you.
If you are a system administrator who also manages HR records, you may give access to yourself or to other users. Line managers usually do not need access to disciplinary information.
Give disciplinary access
A system administrator can give access by:
-
updating a Set Rights role and reassigning it, or
-
updating Set Rights permissions for an individual user
These steps show how to give Disciplinary access to an individual user, whether that is yourself (if you manage HR records) or another HR team member.
If you have Disciplinary access, go to the Create a disciplinary record section.
Update an individual’s Set Rights to give Disciplinary access
These instructions assume a system administrator updates Set Rights permissions for an HR member. If you are a system administrator and also HR, follow the same steps in your own record.
-
Sign in to Staffology HR.
-
Go to Directories > Employees (or other relevant tab).
-
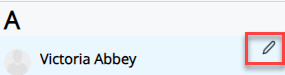
Search for the required HR member, select their record, and choose Edit.
-
You can also select the edit icon displayed next to the HR member's name
-
-
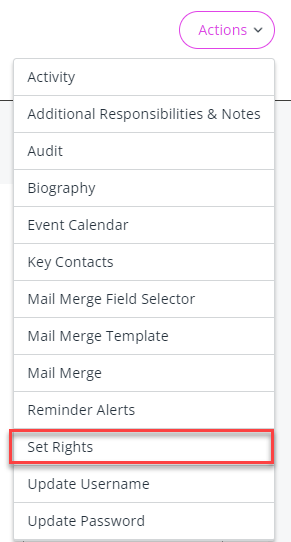
In Personal, select Actions > Set Rights.
-
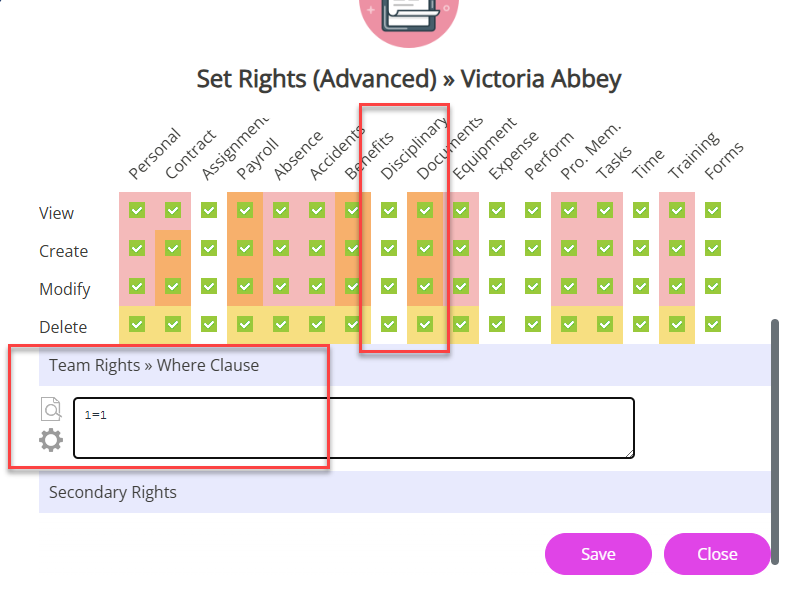
The Set Rights screen opens. Select Advanced.
Choose the correct section based on whether the HR member has direct reports.
HR member with no direct reports:
-
Open their Team Rights.
-
Find the Disciplinary column, and select the required checkboxes.
-
For example, select all of checkboxes to give full disciplinary access
-
-
In the Team Rights >> Where Clause Allows you filter records using a specific criteria., enter 1=1. This gives the HR member access to the disciplinary tab in all employees' records
1=1 is a technical term and means that the statement equals true.
HR member with direct reports:
-
Open their Secondary Rights.
-
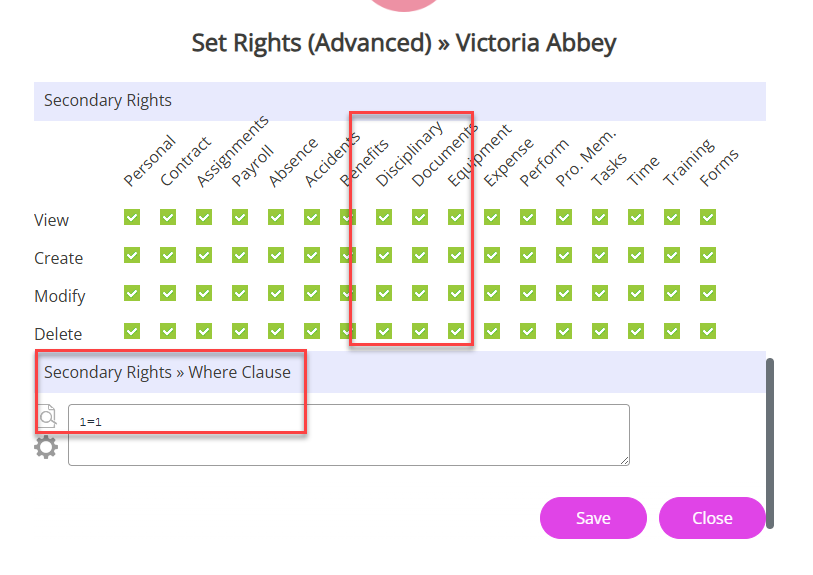
Find the Disciplinary column and select the required checkboxes.
-
For example, select all checkboxes to give full disciplinary access.
-
-
Open their Team Rights.
-
Find the Disciplinary column and select the same checkboxes.
Team Rights override Secondary Rights. Select the same checkboxes in both sections to make sure the permissions apply correctly.
-
In the Secondary Rights >> Where Clause, enter 1=1.
-
This setting gives the HR member access to the Disciplinary tab in all employees’ records, not just their direct reports
-
-
-
Select Save on the Set Rights (Advanced) screen
-
Select Save again on the main Set Rights screen.
You have successfully given the HR member access to the Disciplinary tab in employees' records. For help on completing the disciplinary form, refer to Create a disciplinary record.
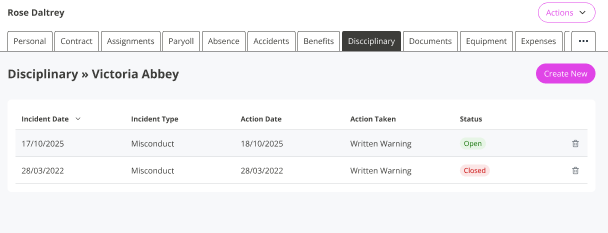
Create a disciplinary record
-
Sign in to Staffology HR.
-
Go to Directories> Employees (or other relevant tab). Search for the required employee, select their record, and choose Edit.
-
You can also select the edit icon displayed next to the employee's name
-
-
Select Disciplinary, then Create New.
-
The Disciplinary form opens.
Incident Details
-
Add details about the incident, including:
-
Date of incident
-
Category
-
Type
-
Any additional details
Fields marked with a dot are mandatory.
Disciplinary Meeting (optional)
-
-
Enter details about the disciplinary meeting
Disciplinary Action (optional)
-
Add information about the action taken, including Action Date and notes.
Disciplinary Appeal (optional)
-
If the employee has appealed, enter Appeal Date, Outcome, and any Notes.
Follow-up (optional)
-
Enter follow-up notes and select the Closed checkbox when the disciplinary process is complete.
Further Actions
-
Select the Actions list to:
-
Add a reminder about this disciplinary
-
Link a document to it
-
include it in an audit
Save the disciplinary
-
-
Select Save
-
The disciplinary table updates with the entry you added.