Create a Read & Accept document
In this section:
Create a Read & Accept document for a group of employees
To create a Read & Accept document for all or a group of employees:
-
Sign in to Staffology HR.
-
Go to System Tools > Utilities > Company > Read & Accept:

A list of Read & Accept records displays, including those created via the Company Handbook:

-
Select Create New and complete the form using this table as a guide:
Acceptance Type Select an option from this list.-
Flag - employee selects this to confirm they have read the document.
-
Signature - allows employees to enter their name to confirm they have read the document.
-
E-signature - allows employees to draw their signature with a mouse or finger/stylus on a touch screen.
Title Enter a name and the subject line for the document.Notes If required, add any notes or comments about the contents of the document.Published Date Select the date you want the document to become available for employees.Owner/Author Choose the employee to own the Read & Accept document - you can choose someone other than the creator of the document.The email address of the employee you add here populates in the Query Email field.Query Email This field populates with email address of the employee you chose for the Owner/Author and is used for employees to send any questions about the document before they accept it.You can change this from the owner's email address, if you would like someone else to receive the queries.Document Select Choose File then navigate to and upload the document you want employees to read.Where Clause Allows you filter records using a specific criteria. Controls which users are able to access the document. If blank, all users can view. Select the preview icon to check who is assigned to the Where Clause.Read By Enter a date employees must read the document by. Read By Reminders Select if you want the system to send reminders. Read By Days Specify the number of days you want the system to wait before sending reminders. Read By Recurring Selecting this means they system sends a reminder on the frequency you specified in Read by Days. Accepted Notification Select this to send a notification to the creator of the document when an employee accepts it.Active Select the make the Read & Accept document active. -
-
Select Save. The entry appears in the list view.
Once the published date is reached, the document becomes visible to all employees on their Home page within the Notifications section:

Create a Read & Accept document for an Individual Employee
-
Sign in to Staffology HR.
-
Go to Directories and select the required employee.
-
Select Edit.
You can also select the Edit icon displayed on the employee's name:
-
Go to the employee's Documents tab and select Create New.
The Documents form opens.
-
Enter the Date you added the document.
-
Choose the document type from the Description dropdown.
To add more options to the lookup (dropdown), select the word Description.
-
Select the document category from Category dropdown (optional).
To add more options to the lookup (dropdown), select the word Category.
-
Give the employee more information about the document by adding Notes (optional).
-
Add a document Review Date (optional).
-
Add a Publish Date when you want the document to be available for the employee to view (optional).
If you do not add a Publish Date, the document becomes available for the employee to view immediately.
-
Select Add Document to upload the document.
You must save the form before you can upload a document, but make sure to complete all form fields before saving.
-
Select the checkbox to make this a Read & Accept document.
If selecting Read & Accept additional fields display:
-
Select Notify Employee to send the employee a notification that a document is waiting for them to review in their record (optional).
-
Add a document Title and a Query Email for the employee to use if they need to contact someone before accepting the document.
-
-
Select the Sensitive record checkbox and choose who can access the document (optional).
If you leave this checkbox deselected, anyone with access to the employee's details can view the document.
Admin sets automatically when selecting Sensitive record.
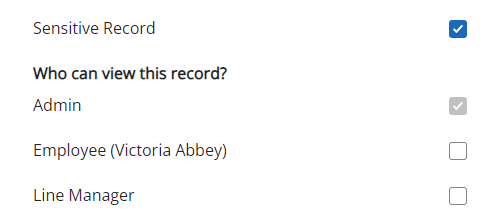
Who can view this record?
-
Select Employee to allow the employee to read and accept the document.
-
Select Line Manager to give the employee's line manager permission to view the document.
-
Select Save to save your updates.
-
If you selected Add Document, another screen displays. Select Choose file and upload the document as required.

-
After saving and uploading the Read & Accept document, the employee's Documents tab updates:

If you provided a publish date, the document appears in the Notifications section of the employee's Home page on the date specified. Otherwise, it displays immediately.