Customise login screen using the Custom Login Screen Builder
Colour combinations that work well in your organisation's branding may not always provide enough contrast to be clear on screen. To learn more about making accessible choices, Colour contrast and branding help for administrators.
There are two parts to the Login screen that can be customised:
- The left side with:
- Your company logo.
- A welcome message.
- Background colour for the sign in fields.
- The right side with:
- An image.
- A background colour.
To customise the login screen:
- Go to System Tools, select Utilities, then Company, then Custom Login Screen Builder.
-
For the Left Side:
-
To have a custom URL for the sign in, enter the details you want in URL Extension. For example, your company name.
The URL extension must only contain a-z and 0-9 characters, without spaces.
-
Only for organisations with the multi-language feature. Select the System Default Language for all employees.
The System Default Language option in System Configuration and Custom Login Screen Builder are linked. If it is changed in the Custom Login Screen Builder, both areas are updated.
-
Enter an optional Welcome Message to display above the sign in.
-
If you have added your organisation logo in Branding, to not display it on the sign in, select Hide Company Logo.
-
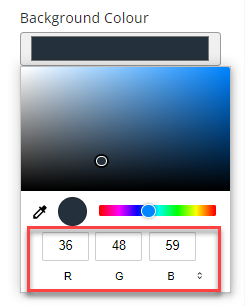
To change the background for the left side of the screen, select Background Colour, then either:
- Select the colour.
-
Enter a colour code. To select different colour codes, select the arrows next to the code value to switch between RGB, HSL, or HEX.
-
-
To change the colour of the Sign in button, select Button Colour, then either:
- Select the colour.
- Enter a colour code.
-
- For the Right Side, select if you want the Background to be a Colour or Image.
- To use a colour:
- Select Background Colour.
- Then either select a colour or enter a colour code.
- To use an image:
- Select Image.
- From Background Image, select either:
- Upload, then Choose file — to use your own image.
- Stock Image — to select an image from a stock library.
- To use a colour:
- To view the changes before applying them, select Preview.
- Select Save.
If you no longer want branding applied, to remove it, select Reset to Default.