Set up your system - Foundation
This topic guides you through the first steps to setting up your new Staffology HR system as a Foundation user.
Set up your user sign-in details
-
Open your welcome email and select the activation link.
-
Set up your password.
-
Select Login.
Congrats! You are now the System Admin of your Staffology HR system. You are now ready to add your company's information into Staffology HR.
Set up your Staffology HR system
Add company details
You can Save & Exit at any point and return later to complete the set up.
-
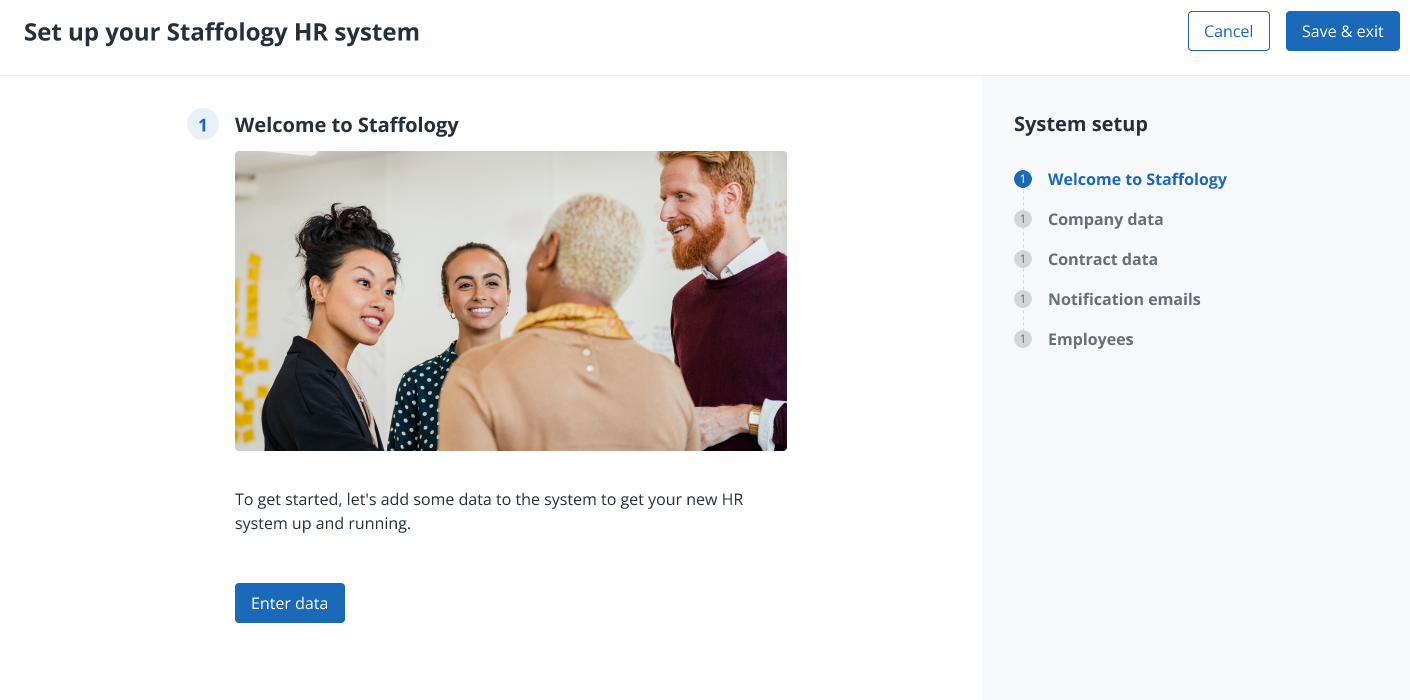
On the Set up your Staffology HR screen, select Enter data.

-
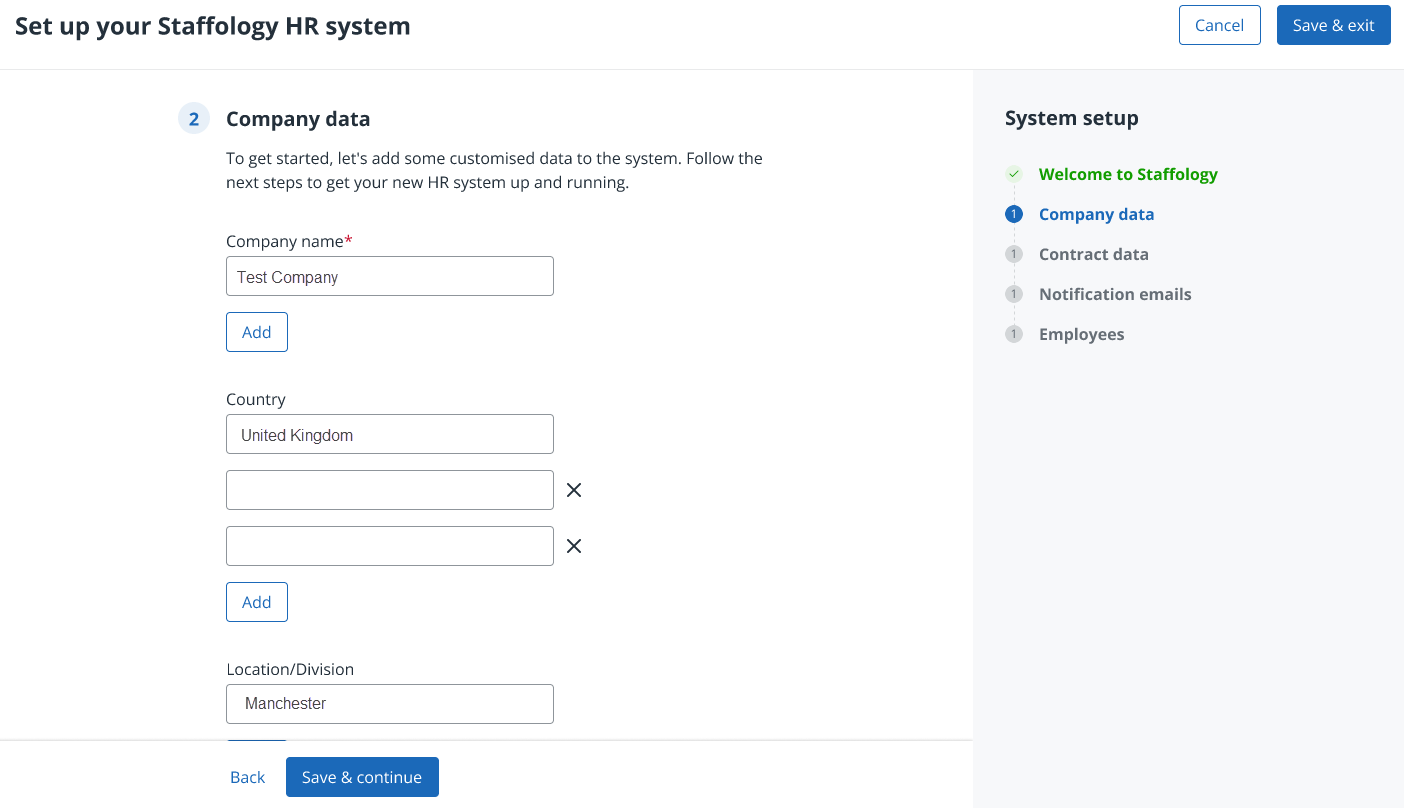
A Company Data screen opens.
-
-
Enter here your Company name and other relevant details.

-
Select Add under each heading to create more locations etc.
The system adds these options to dropdown lists (lookups) once you complete the setup and sign in to the live system.
Add contract information
-
Enter details about Job Types and Roles.
If needed:
-
Add a scheme name in Brought Forward Scheme then enter the number of months the holiday carryover remains valid.
-
Add an Entitlement Scheme, then enter the number of days' holiday an employee receives in Holiday Entitlement .
-
-
Select Save & Continue.
Create notification emails
-
Complete the Update Email and Absence When an employee or worker is absent from work. This can be for a variety of reasons. Email fields to ensure the right people receive notifications when:
-
You update a tab.
-
An employee requests an absence.
-
Add employees
You can add your employees during setup or later.
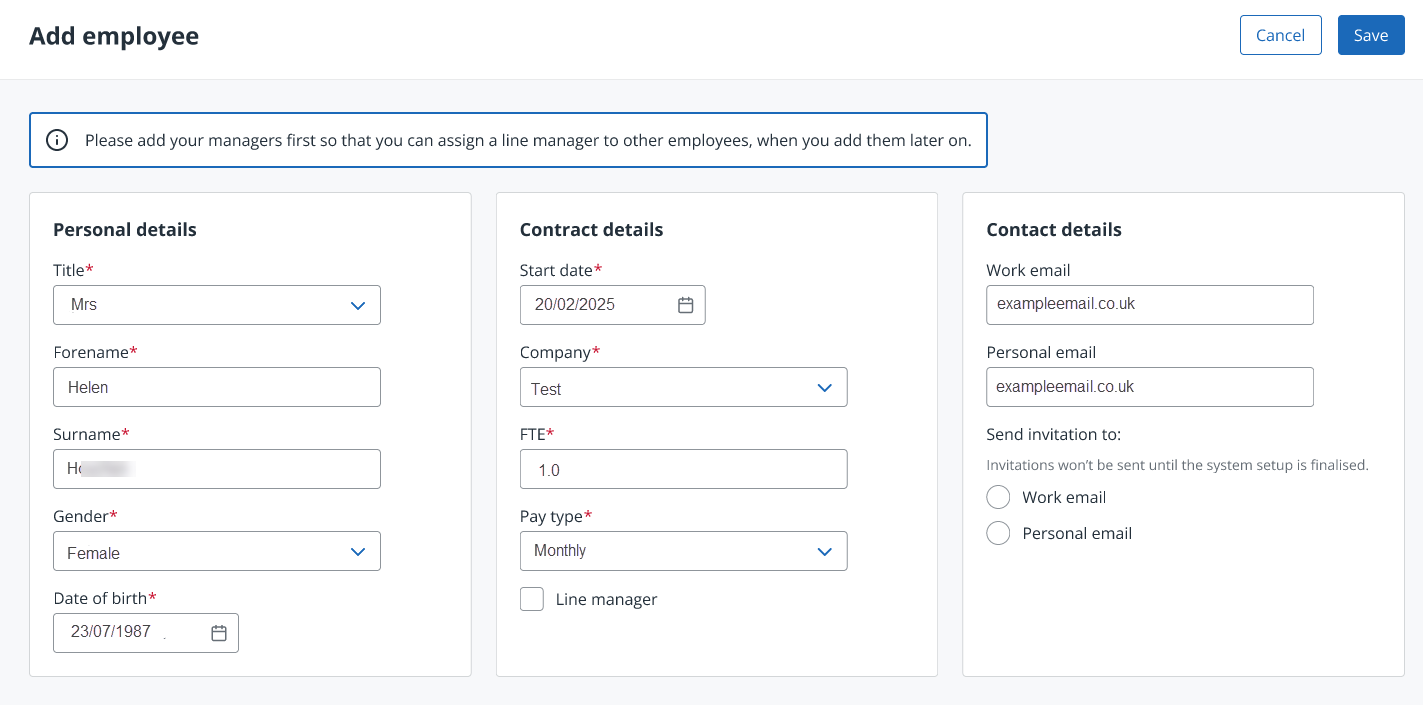
Add line managers first so you can assign them to employees immediately.
To add an employee:
-
Enter the employee's Personal details
-
Add the employee's personal information, including their forename, surname, and date of birth.
-
-
Enter contract information
-
Include their start date, company, and pay type.
-
-
Enter additional information
-
Enter additional information about the employee, such as their contact details, job information, and contract type.
-
-
Send the invitation email:
-
Choose whether to send it to the employee’s personal or work email.

-
-
Select Save after entering employee details.
Complete setup
-
Once everything looks correct, select Finish Setup. Your Staffology HR system is now ready to use.
Accessibility
Keyboard Navigation
All interactive elements on the Set up screens are keyboard accessible and are highlighted when focussed.
Screen Reader
ARIA labels provide context to interactive elements without visual labels, such as icons and provide alternative labels to substitute visual context.